Write to a custom contact group
Use the pink drop-down list in the Pupil Manager module to send letters to Custom Contact Groups, follow the steps below:
- In the Pupil Manager module, select the Current Students tab.
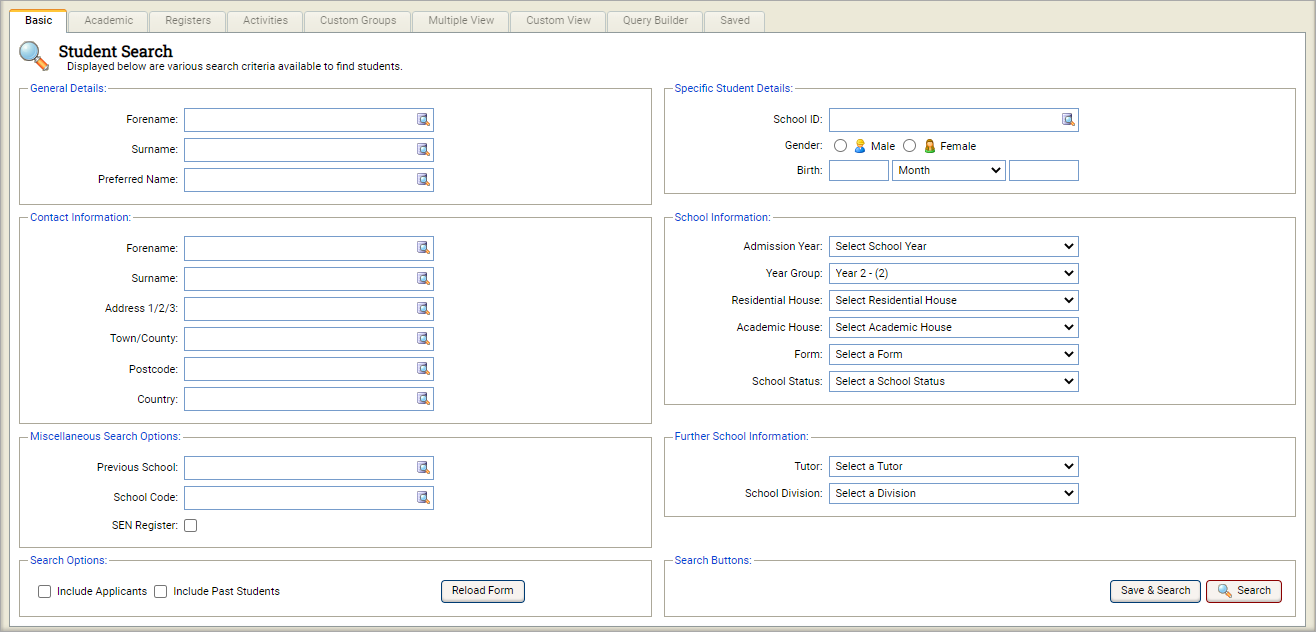
- Click Custom Search and select the Basic tab. The Student Search screen is displayed:
- In the Search Options section, check the boxes available to Include Applicants and Past Students, if required. This ensures that all records can be selected and then filtered for membership to the contact group.
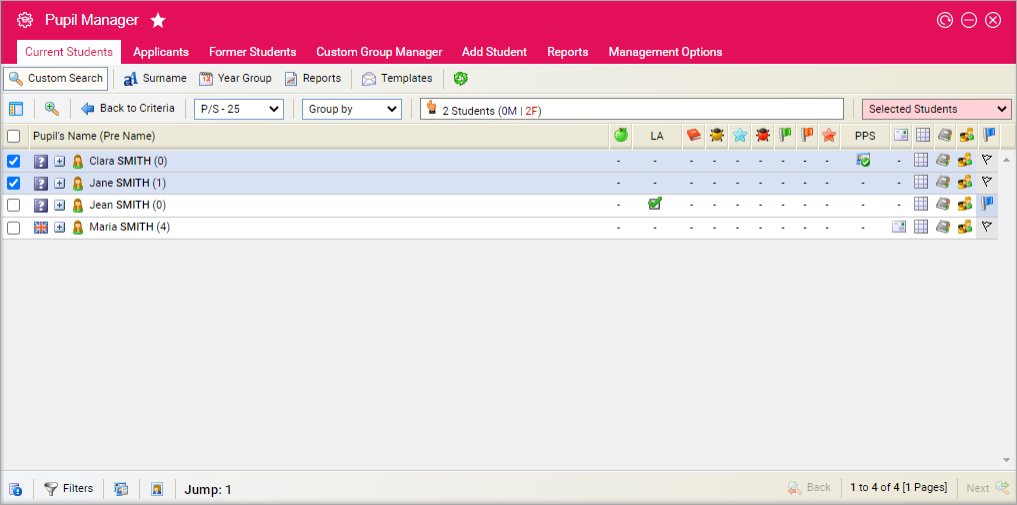
- Click Search. Results may take a while to display, depending on the volume of records held in the module. The Student/Pupil Records List is displayed:
- Select 'P/S - ALL' in the page size drop-down in the header bar. This ensures that all records can be selected and then filtered for membership to the contact group.
- Select all of the student records by checking the box in the header bar.
- Select Letter Merging from the pink drop-down list. The Mail Merge Preview window is displayed:
-
Choose to send:
 An existing letter or edit an existing letter
- Select a tab to work with and select on the letter that you want to use.
- To edit the letter, select Edit Letter to open the Letter Preview window:
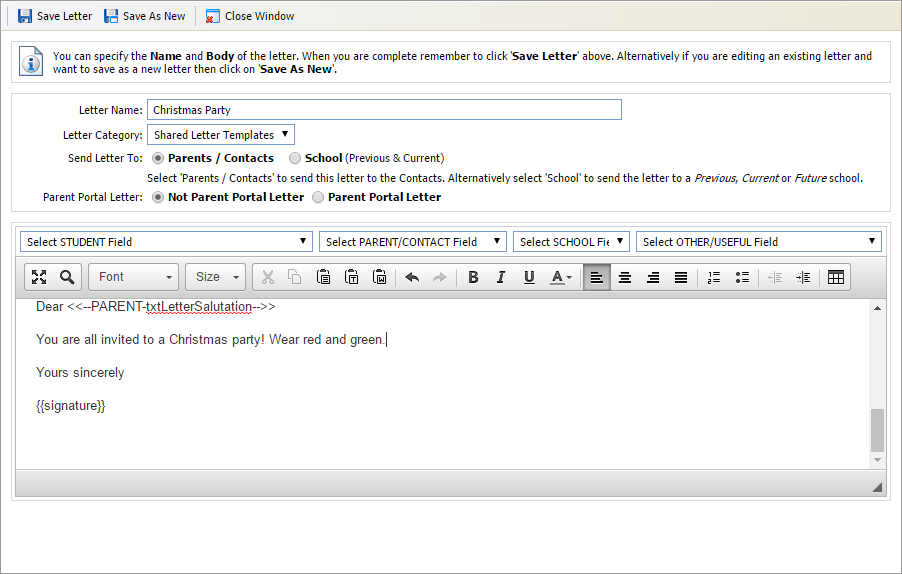
- Edit the Letter Name, if required. The nature of the letter must be clear as this is listed when you select a letter to send.
-
Edit the Letter Category:
- 'Shared Letter Templates' can be selected by any user with access to student records.
- 'My Letter Templates' are solely for your own use. This is useful for communication which you want to control, such as offer letters.
-
Select who to Send Letter To:
- Parents/Contacts. Letters can be sent to any student contact has the Mail Options of All Merges or Correspondence selected in Student Contacts.
- School. Letters can be sent to a student's previous, current or future school.
- Select whether the letter is related to the Parent Portal or not. Parent Portal letters are sent to parents to help them activate their portal accounts.
-
Edit the body of your letter in the free text box:
- Add fields using the drop-down lists available, where required. Some fields are already entered for you.
- Use the standard toolbar to format your letter, as required. You do no need to add header and footer information here.
- Either:
-
Click Save Letter to
overwrite the existing letter. You are prompted Are you sure you want to save this letter?
or - Click Save As New to save both the original and the amended letters. You are prompted Are you sure you want to save this letter as a New Letter?
-
Click Save Letter to
overwrite the existing letter. You are prompted Are you sure you want to save this letter?
- Click OK. A preview of your letter is displayed.
-
Choose to either:
- Print Letter to
keep a hard copy on file.
or - Edit Letter to
return to the Letter Preview window
and amend the letter further.
or - Close Window to return to the Mail Merge Preview window and use the letter.
- Print Letter to
keep a hard copy on file.
 A new letter
- Click Create Letter at the top of the window. The Letter Preview window is displayed:
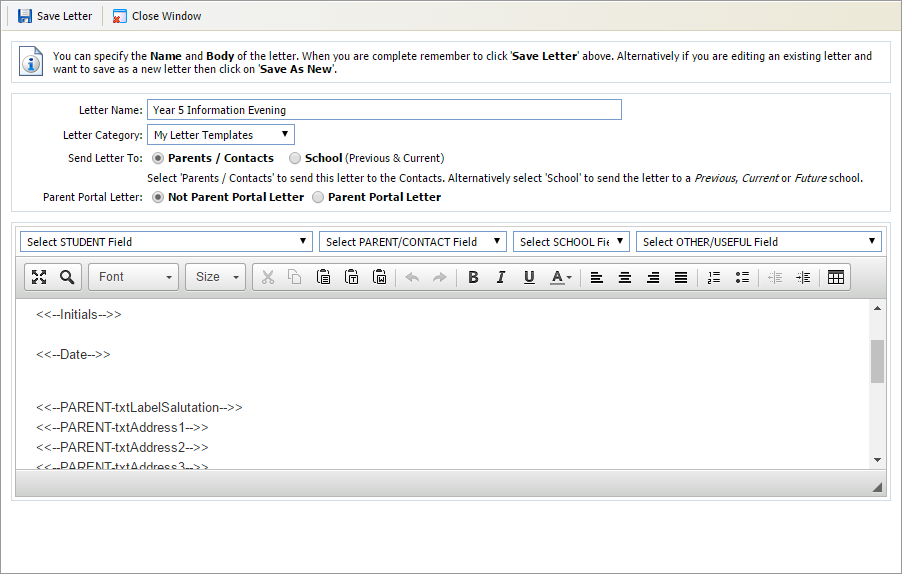
- Enter a clear a concise Letter Name. The nature of the letter must be clear as this is listed when you select a letter to send.
-
Select a Letter Category:
- 'Shared Letter Templates' can be selected by any user with access to student records.
- 'My Letter Templates' are solely for your own use. This is useful for communication which you want to control, such as offer letters.
-
Select who to Send Letter To:
- Parents/Contacts. Letters can be sent to any student contact has the Mail Options of All Merges or Correspondence selected in Student Contacts.
- School. Letters can be sent to a student's previous, current or future school.
- Select whether the letter is related to the Parent Portal or not. Parent Portal letters are sent to parents to help them activate their portal accounts.
-
Write the body of your letter in the free text box:
- Add fields using the drop-down lists available, where required. Some fields are already entered for you.
- Use the standard toolbar to format your letter, as required. You do no need to add header and footer information here.
- Click Save Letter. You are prompted Are you sure you want to save this letter?
- Click OK. A preview of your letter is displayed.
- Click >Close Window. The new letter is now listed in the Mail Merge Preview window, ready for use.
-
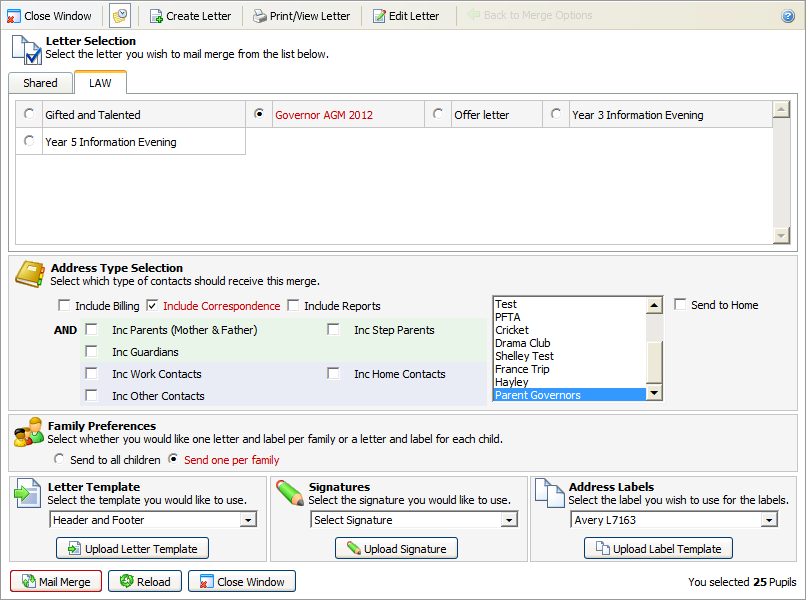
Under Address Type Selection filter the contacts who are to receive the letter and where it is sent. For example, choose to send a letter to billing contacts who are listed as parents whose main address is listed as a work address. If no selections are made in this section, letters are addressed to all contacts (apart from Contact Only contacts).
Use as many filters as you need:
-
Apply Mailing Options filters to the types
of contact who are to receive the letter. All contacts are set up to receive different types of correspondence. Only
these contacts will receive the letter:
- Billing. Contacts who receive invoices.
- Correspondence. Contacts who receive all general school correspondence, such as weekly newsletters.
- Reports. Contacts who receive academic reports.
- Apply Relation Type filters (highlighted green). Only the selected relation types receive the letter. For example, if you check Inc Guardians only contacts marked as guardians are sent the letter.
- Apply Address Type filters (highlighted blue). Only contacts with the address type you select are sent the letter. For example, if you check Inc Work Contacts only contacts with a work address listed are sent the letter.
- Select a Custom Contact Group from the list displayed. Hold Ctrl to make multiple selections. Only contacts in the custom contact group you select are sent the letter. For example, if you select 'Parent Governors' only contacts in this group are sent the letter.
- Select Send to Home. Your letter is only sent to contacts who have the Student Home box checked in contact records.
-
Apply Mailing Options filters to the types
of contact who are to receive the letter. All contacts are set up to receive different types of correspondence. Only
these contacts will receive the letter:
- In Family Preferences select whether to send one letter for each child listed or just send one per sibling group.
-
Select or upload a new:
- Letter Template. This determines the layout of your letter.
- Signature. This determines the signatory on your letter. Choose to send a letter on another person's behalf, if required.
- Address Labels. This determines the layout of your address labels.
- Click Mail Merge. You are prompted when the mail merge is complete.
-
Choose to either:
-
Click Download the Word Document containing the Letters. Open or Save and
print the file as required.
or -
Click Download the Word Document containing the Labels. Open or Save and
print the file as required.
or - Click Return to Previous Selection and Options Page. Use this to rerun the mail merge, if required.
-
Click Download the Word Document containing the Letters. Open or Save and
print the file as required.
It is important to include all students of the required status in your search.