Configure import options
Use the Configuration tab in the Curriculum Manager module to configure and run the import functions for the module.
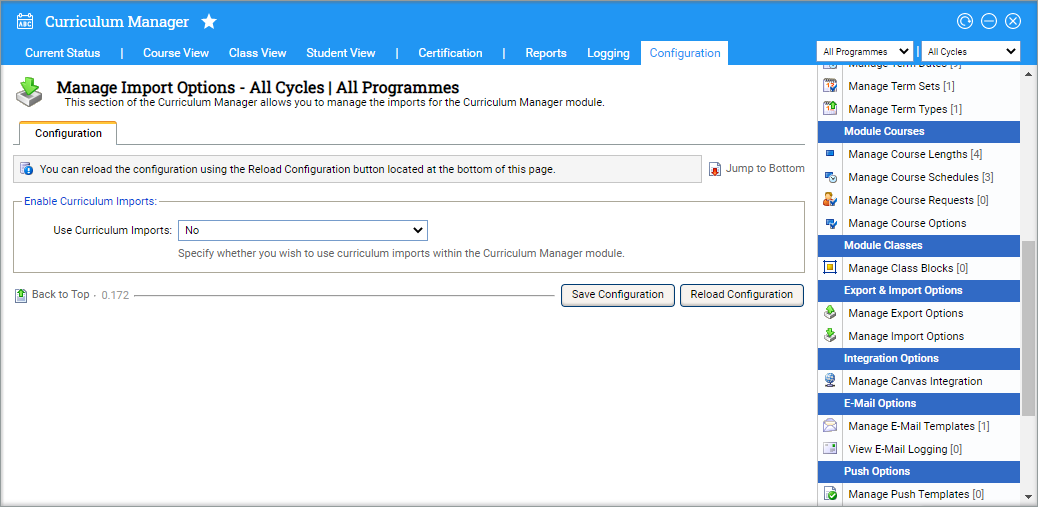
- Open the Curriculum Manager and select the Configuration tab.
- Select Manage Import Options from the right hand menu:
- Select 'Yes' in the drop-down to turn on the import function.
- Select Save Configuration. Additional tabs are now displayed.
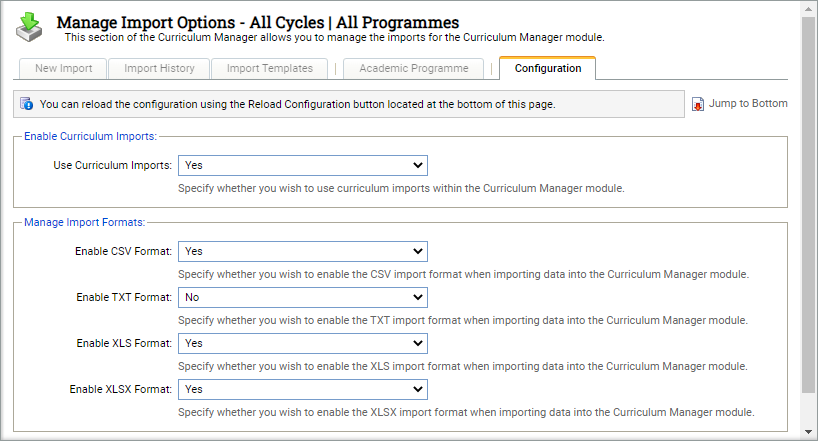
- In the Configuration tab, use the drop downs displayed to select the import formats that you want to be available in the module:
- Select Save Configuration.
-
Select the Academic Programme tab, either:
- Select the entities that you want to enable in imports. Your selections determine the imports available to run from Configuration > Manage Import Options > New Import.
-
Select Save Entities.
or
- Select Enable All to enable all entities to be used in imports. Choosing this option ensures that all imports are available to run from Configuration > Manage Import Options > New Import.
- Select Yes to confirm.
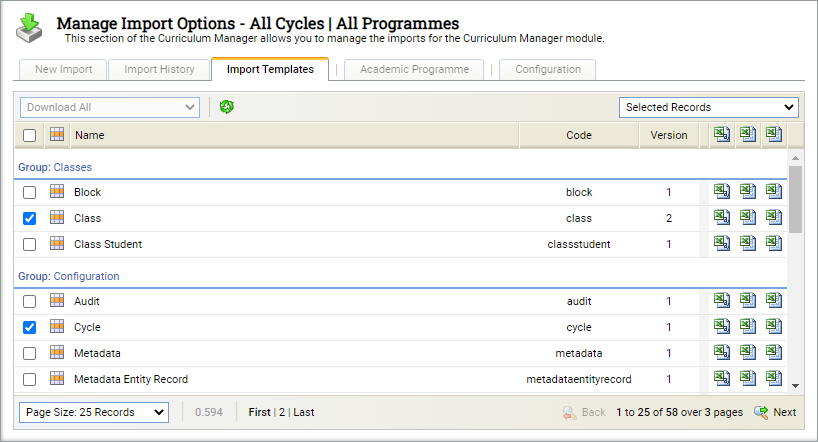
- Select the Import Templates tab and download the templates which can be used to import data back into the module:
- Choose to:
- Use the checkboxes on the left to select multiple items for the template and use the drop-down in the top right to select the format for the template. Each item selected will have its own page in the template.
- Scroll to an individual item and click on a format icon to download a template.
- Leave the left hand checkboxes empty and use the drop-down in the top left to select the format for the template. Each item will have its own page in the template.
- Once you have downloaded a template, it can be populated and the data imported into the module.
- Select the New Import tab to run an import.

Only the Configuration tab is displayed until the feature is enabled.

