Install, Licence, and Configure ID Manager
Initial Configuration
ID Manager must be licensed before you can use it. If you do not have an ID Manager licence installed, the following window will appear:
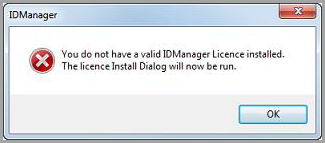
To acquire the licence required, you'll need to visit a specific folder location on the server with your IRIS BioStore system installed. The folder path is: C:\ProgramData\BioStore Solutions\BioStore\Licenses
One in this folder you should see some sub-folders named after the various products you are licenced to use. For Example you might have a folder named BioStore Registration, inside this folder will be a number of licence files including one named ID Manager Licence.bslf.

Use this licence file when prompted after launching ID Manager on the new installation location.
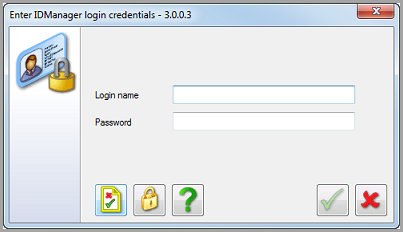
OnceID Manager is licensed, the login window will appear. At this stage it is not necessary to enter a username or password. Select Edit Configuration to open the configuration window: ![]()
In the configuration window, ensure the Server button is selected. In the Address : Port box, enter the hostname or IP address that the BioStore Primary Server is installed on, followed by the port number. You can find the port number in use by opening your BioStore Primary Server Setup application or checking another ID Manager client.
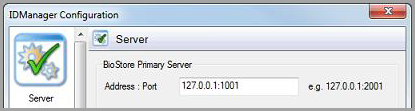
Click OK to save the entered details, or Cancel to discard your changes and return to the login window.
![]()
![]()
After entering the correct details for the BioStore Primary Server, you'll be able to log in to ID Manager. Alternatively, before logging in you can set up any hardware that you wish to use with ID Manager, such as finger scanners or card readers. See the other configuration topics in this documentation for further information.
For each installation of ID Manager, you'll need to enter the BioStore Primary Server hostname/IP and port number so that it knows where your database is. You'll only need to do this once per installation.
Install ID Manager
Run the ID Manager installer wizard.
Review the Software Licence Agreement. You must select I accept the terms in the Licence Agreement to continue.
From Select Installation Folder, select Browse..., then the required folder. Select Next.
Select the applications you want to install, then Next.
If you have Futronics fingerprint scanners connected to ID Manager, you must also select the Client Setup application.
To confirm installation, select Install.
Finger Scanner Configuration
Before you can use ID Manager to enrol users' finger scans, you need to set up a finger scanner. To do this, select Edit Configuration fromID Manager's login window, or go to Tools - Configuration after logging in. In the configuration window, select Scanner:
![]()
Make sure you've installed the finger scanner drivers before plugging the scanner into a computer. Contact your IRIS BioStore supplier if you need help with this.

After selecting the Scanner button, you are presented with the following window:
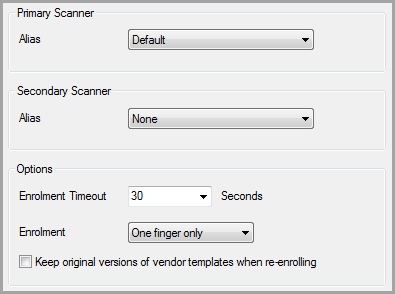
From here, you can select the finger scanner that you want to use with ID Manager. You can also optionally connect a second scanner (as long as it's a different model) to use as an alternative.
Primary Scanner
Alias: Aliases are names given to each connected scanner, so that you can optionally use more than one scanner on a single computer. If you're only using one scanner, you can leave this option set to Default. Otherwise, select the alias given to the scanner in the Client Setup application.
Secondary Scanner
Alias: This option has the same purpose as the Primary Scanner Alias, except it allows you to select a second scanner to use with ID Manager, giving you an extra option to use when scanning users' fingers.
Avoid using the same model scanner for both Primary/Secondary scanner options, this may cause conflicts. For best results use two scanners which are different models.
Enrolment
Enrolment Timeout: Once an enrolment has started, it will timeout after the period of inactivity selected here. The default value is 30 seconds.
Enrolment: You can use this option to select between the two following options:
- One-finger only — Only requests one finger while enrolling. This option is quickest and is recommended if you aren't using two finger authentication.
-
One or two finger — Requests one finger then a second finger by default, however you can click One-Finger Enrolment after scanning one finger to skip the second finger.

Keep original versions of vendor templates when re-enrolling: This option is only required if you're using IRIS BioStore's ID Access(Sync) software. By enabling this, any enrolments made on an ID Access(Sync) scanner will remain on the scanner (though not in ID Manager). This is optional, and should only be used if you experience problems with the ID Access(Sync) scanners.
Select OK to save the settings, or Cancel to discard any changes.
![]()
![]()
Card Reader Configuration
ID Manager can be configured to use card numbers as an option for user identification. You can configure a card reader to be used by ID Manager by selecting Edit Configuration from ID Manager's login window, or go to Tools - Configuration after logging in. In the configuration window, select Card:
![]()
After selecting the Card button, you are presented with the following window:
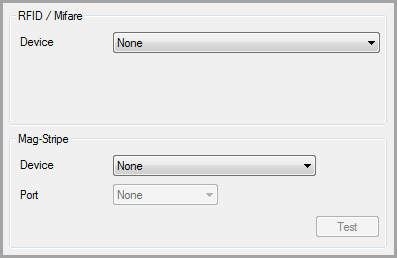
From here, you can select the card readers that you want to use with ID Manager.
RFID / Mifare Device: This drop-down list offers a list of supported card readers. Select the one that you want to use with ID Manager (Use the generic PC/SC option if your card reader isn't an ACS/ACR model).
If you have a Omnikey card reader use the following configuration:

Port / Type: If there is a card reader attached to the printer, it will appear in this list. Select the reader that you want to use with ID Manager.
Select whether you want the reader to read cards in decimal or hexadecimal, and use the Test button to display an entry box which will display a card number (in decimal or hexadecimal as selected) scanned on the reader.