Set Up Grab Bags
Admin Setup
You will first need to make sure you have the option to edit grab bags turned on in the FasTrak Admin Program. This is done through the Maintenance page and settings tab.

Under the Admin Setup - Till select a grab bag option.
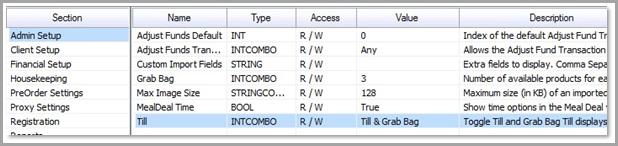
You can also change the number of available products per option in the grab bag by selecting the Grab Bag option. If you change any of the Admin settings, you will need to restart the FasTrak Admin program before they will be applied.
Session Setup
Under the Client Setup there are a number of options for setting up sessions when the grab bag till will be available. This is the time at which people can pre-order a grab bag from the till.
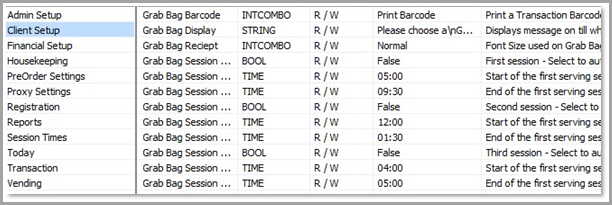
There are further settings which can be configured for the OPOS receipt printer output. The OPOS printer is attached to the client till and prints out the student grab receipt. (For more details view Setting up the receipt printer in the section below)

Login User
Create a login user for the client till.
Go to the Login page and select the Add User button.
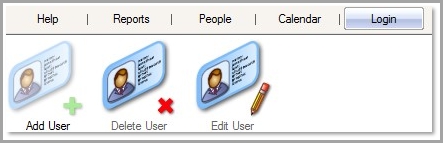
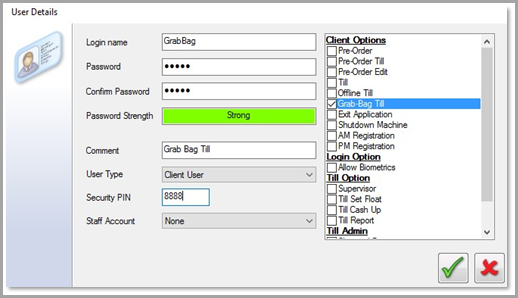
A dialog box will appear.
Select Client User from the User Type drop down menu.
Tick the Grab-Bag Till option at the right.
Enter a Security Pin. This is the number used to login to the till.
Grab Bag Screen
Select the Till page and choose the Grab Bag tab.
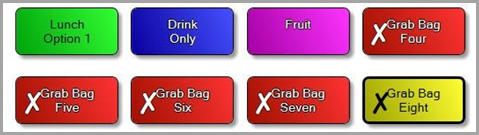
At the top of the grab bag screen are 8 buttons, which represent the possible grab bag categories. If you don’t require all 8 grab bags categories, you can turn the grab bag menu on and off using the Grab Bag On/Off button.
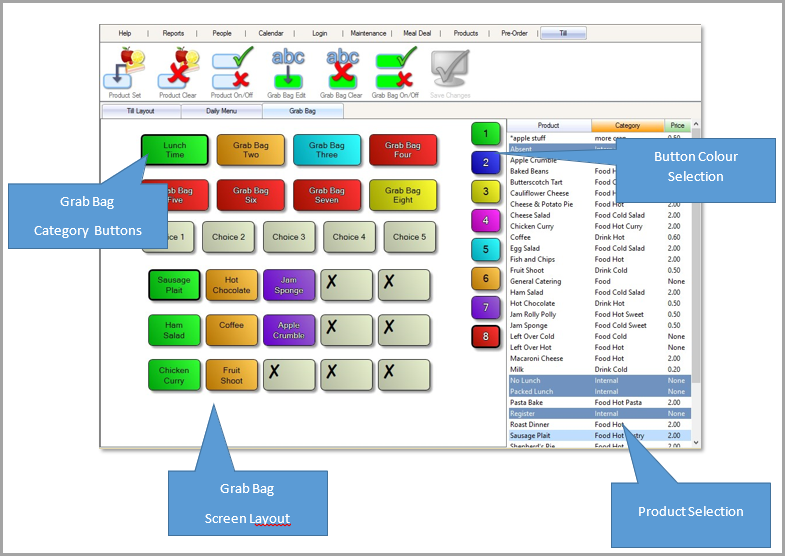
Grab Bag Price
Select one of the grab bag category buttons at the top of the screen layout.
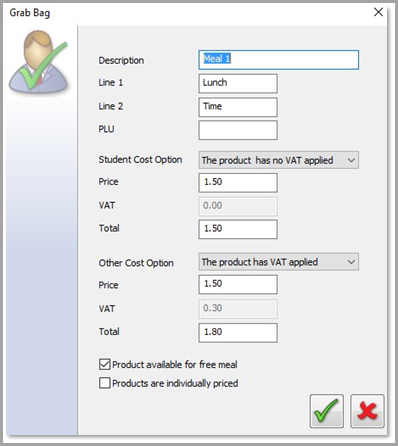
Now select the Grab Bag Edit button.
![]()
Set the grab bag title and price. Choose the Grab Bag Edit button. If the grab bag is to be priced as a single item, then the price will be entered in the edit boxes as show below. If you wish the items to use the individual original product prices, then select the Products are individually priced option.
Set up the other grab bags categories and turn off any categories you don’t require using the Grab Bag On/Off button.
![]()
Adding a Product
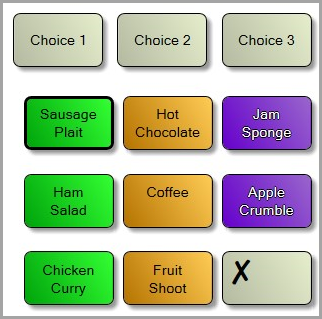
Set up the grab bag categories. There can be up to five choices.
Each choice is a group of products, up to a maximum of 10.
An example is illustrated below. Three categories are set up here, which are Choice 1 – Main Meal, Choice 2 – Drink, Choice 3 – Pudding. The products are listed vertically below the choices.
To assign a product to a button, select the button. Choose a colour for the button from the colours displayed at the right of the till layout, then choose the product from the list at the right hand side of the screen. To confirm the selection, click the Product Set button at the top of the screen.
![]()
Remember to save your changes.
