Keep Calendar Up To Date
For your system to run properly you must ensure your calendar is setup in FasTrak Admin. If the calendar isn't setup then allowances might not correctly deposit or be able to be spent at different times than desired. Primary schools will also need to make sure the correct menus are set up so that the correct options show each day. To do this first find the Calendar section and click on Edit Calendar as shown below:

Once done this will open the following menu:
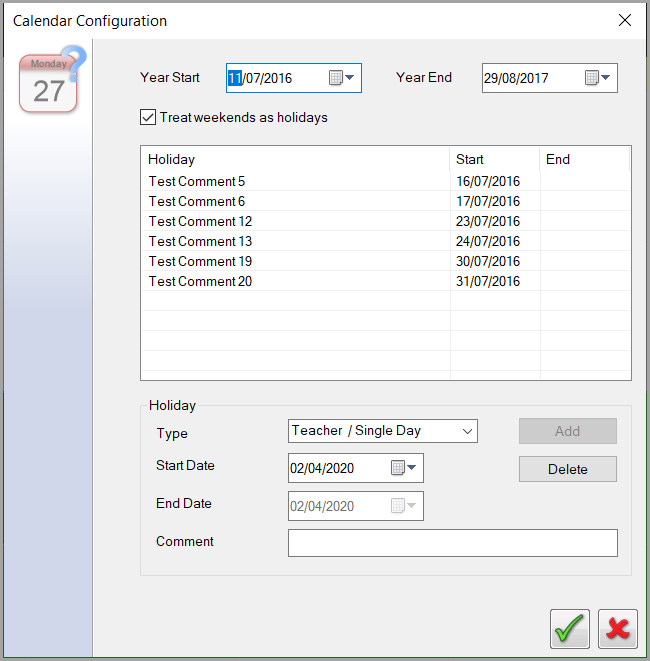
You must first make sure that the dates are correct for this.
Do not change the Year Start date as this controls the history of the FasTrak Database. It is the date that the Fastrak System was originally installed.
If the end date for the calendar runs out other features such as FSM will fail in FasTrak Admin.
The next section includes all holidays that you will be having for the school/organisation. You must enter all holidays into this section so that the system is aware when service is not running. To enter a holiday with a specific date range you will need to choose from the Type drop down box and choose the Date Range option. Once you have added in the holidays details you will need to click the Add button to save the holiday details into the system. Once you are finished you will need to press the green tick located at the bottom of the menu.
Changing allowance times in the calendar:
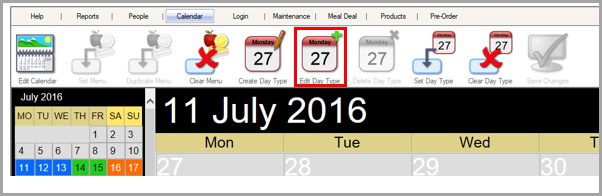
The calendar section is where you will need to setup times for your allowances. You will need to setup the times you wish for these allowances to be active and usable for users. To do this you must go into the Calendar section and click on the Day Type button located on the right hand side of the screen. Once you click on this you will need to choose one of the day types to edit. This is shown below:

Once you have selected a day type you will need to then choose the Edit Day Type button. This will only appear once you have chosen a day type:
The following menu will appear:
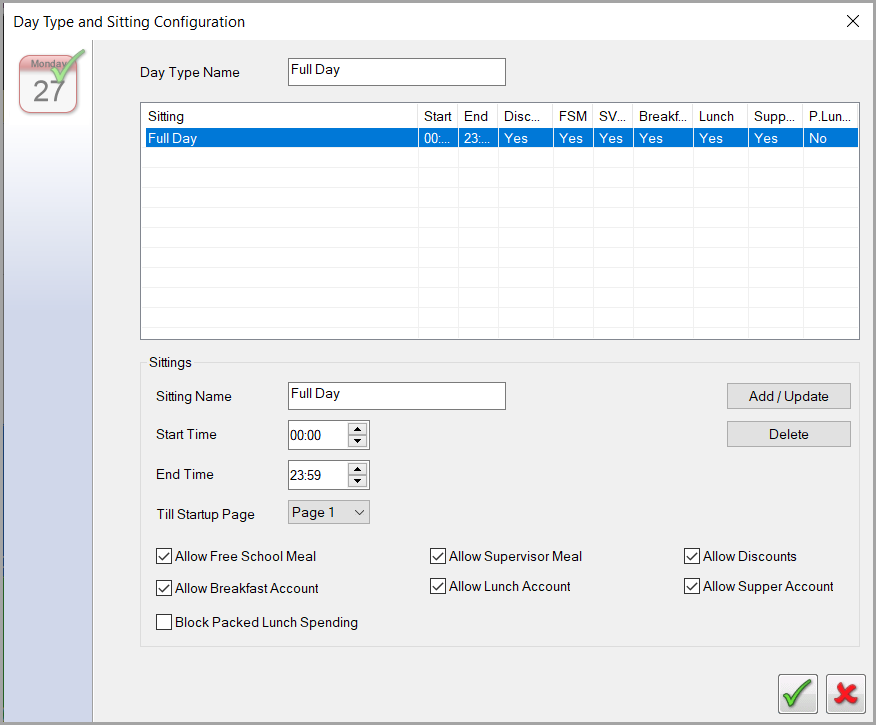
In this menu you are able to setup times for each allowance to be usable. You can setup multiple different time frames for individual allowances. To setup a time frame you must first give this a name and then choose the start and end time that you want users to be able to use this allowance during. Once done you need to tick the appropriate box next to the allowance you are setting up. To save this information you need to click the Add/Update button and then the green tick to finish this setup.
How to create a new day type:
If you wish to setup multiple day types for your system you will need to first click on the Day Type button as shown before on the right hand side of the screen. Once you have clicked on this the Create Day Type button will appear as shown below:
Once you have clicked on this button the following menu will be displayed:
![]()
Using this menu you can create a completely separate day type so that you can have multiple to choose from depending on the situation. Using this menu you can also setup allowances the same way as shown before in the previous Edit Day Type menu.
How to set Menus in the calendar:
To set the menu for an individual day, select the day in the calendar that you want to set > highlight on the right which menu you would like for this day and click Set Menu.
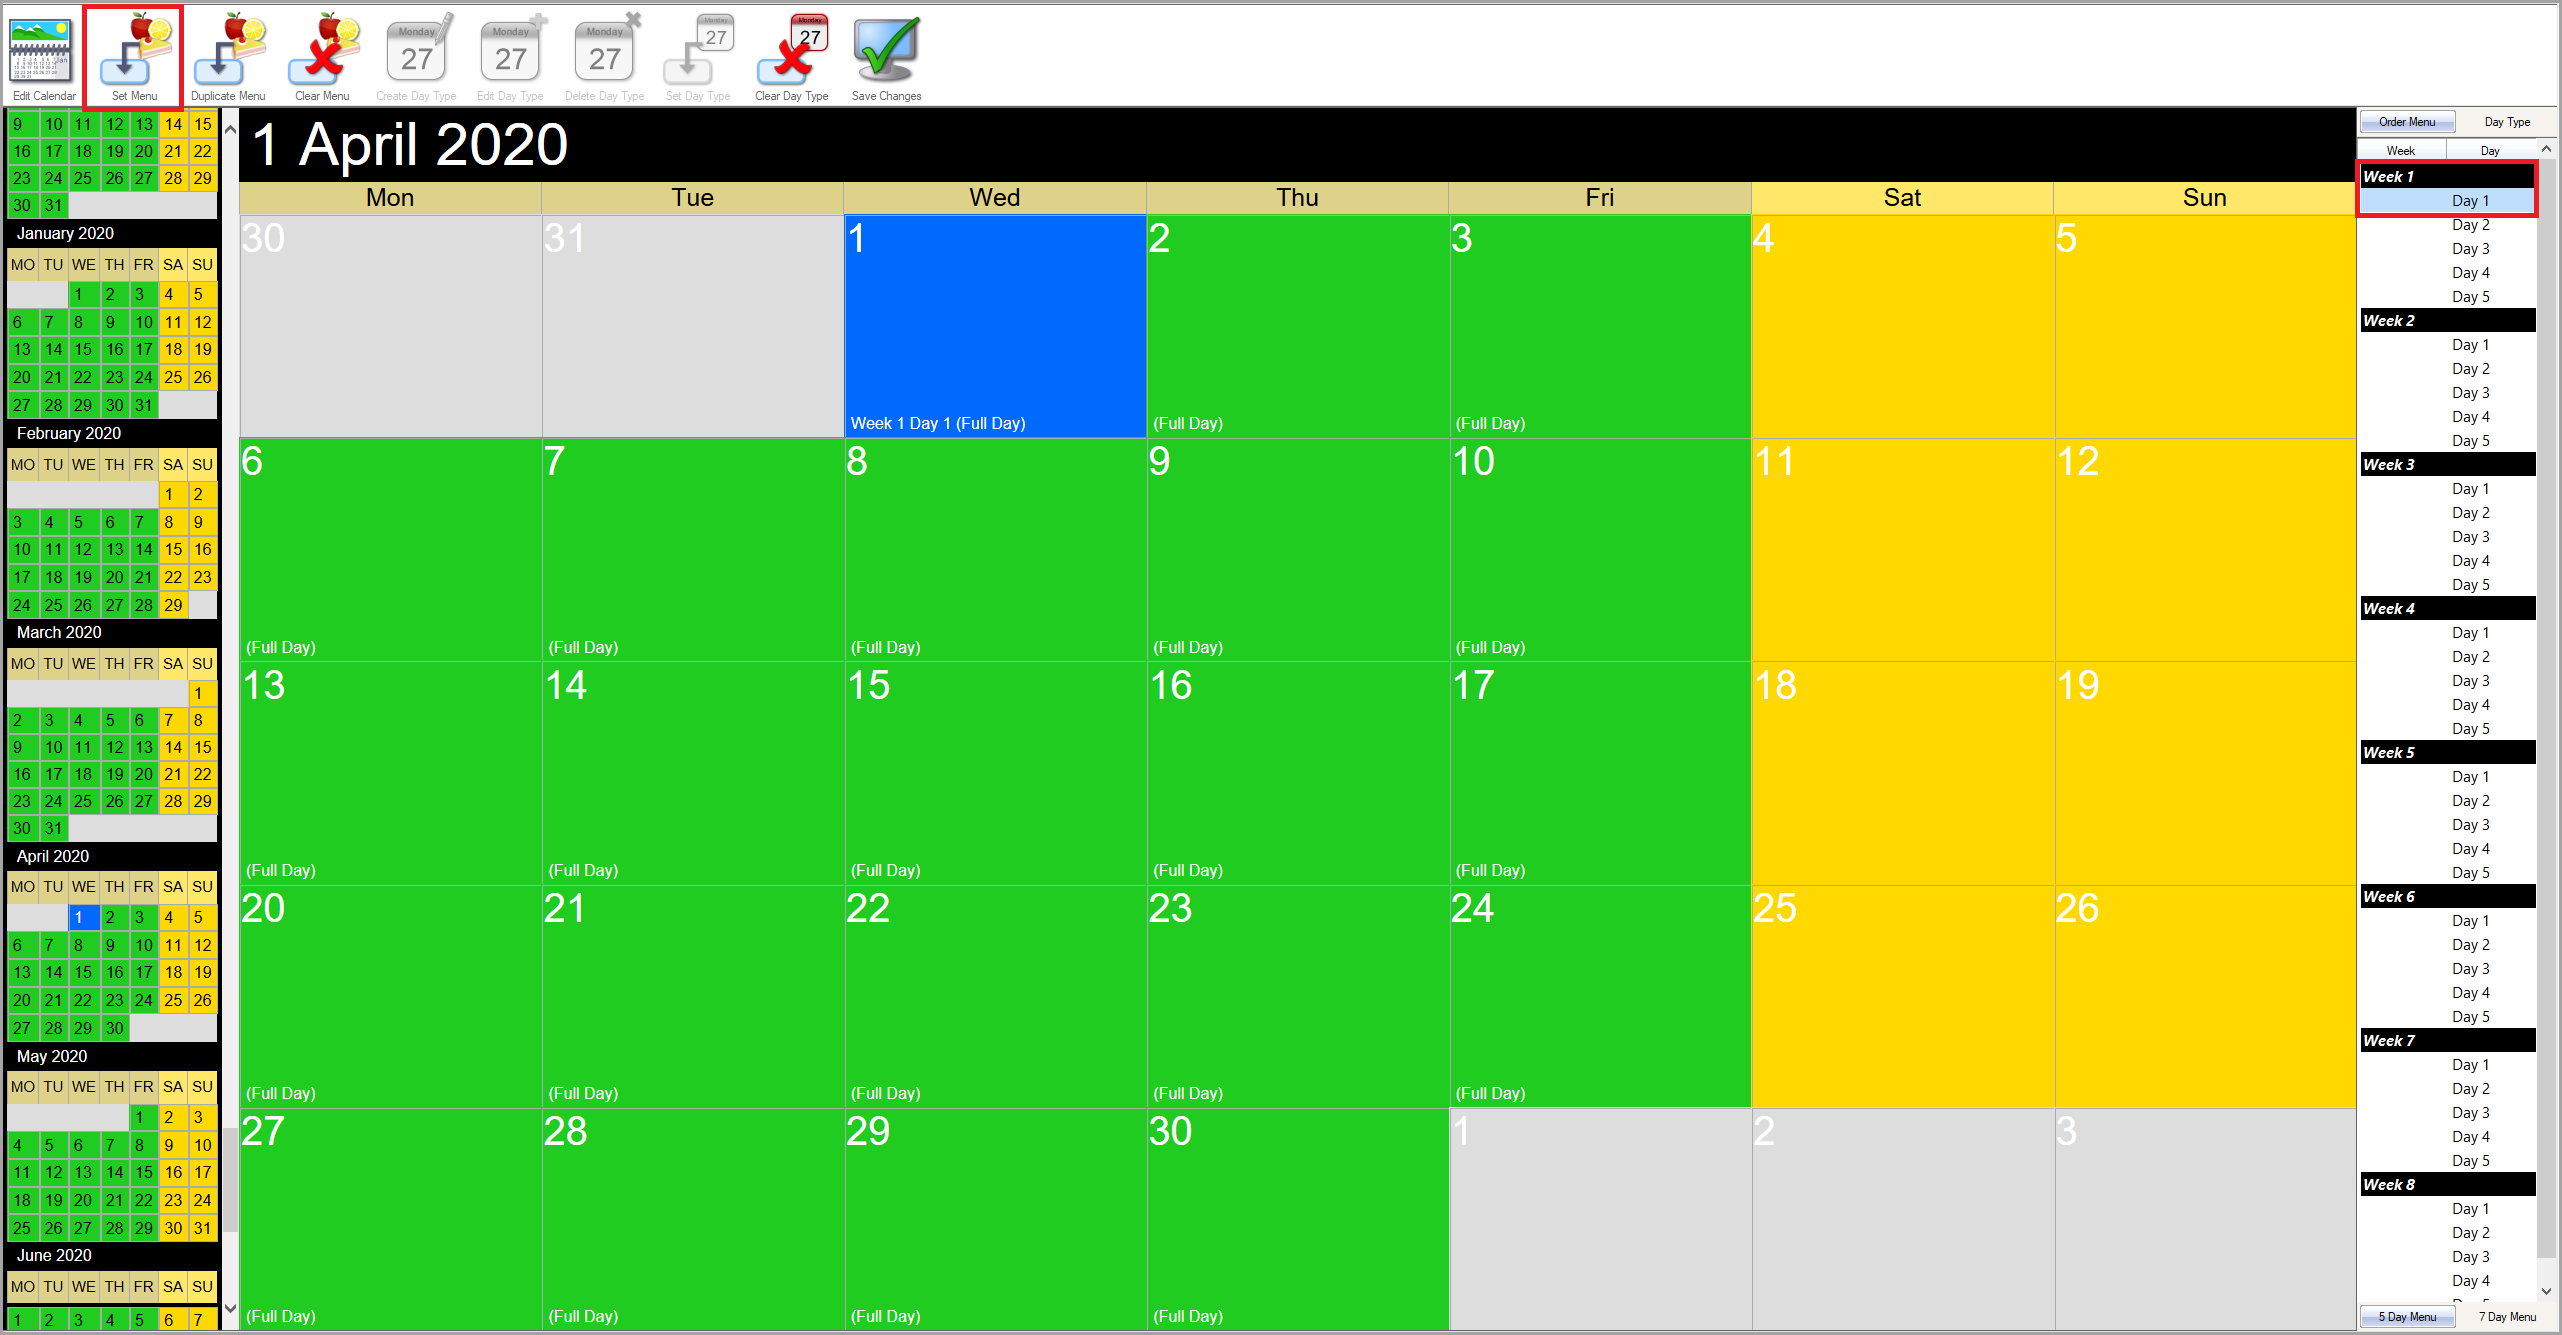
To set the same menu for multiple days in a row, you can use Duplicate Menu and enter how many days in a row you want this to be set for. You should then see something similar to the following example:
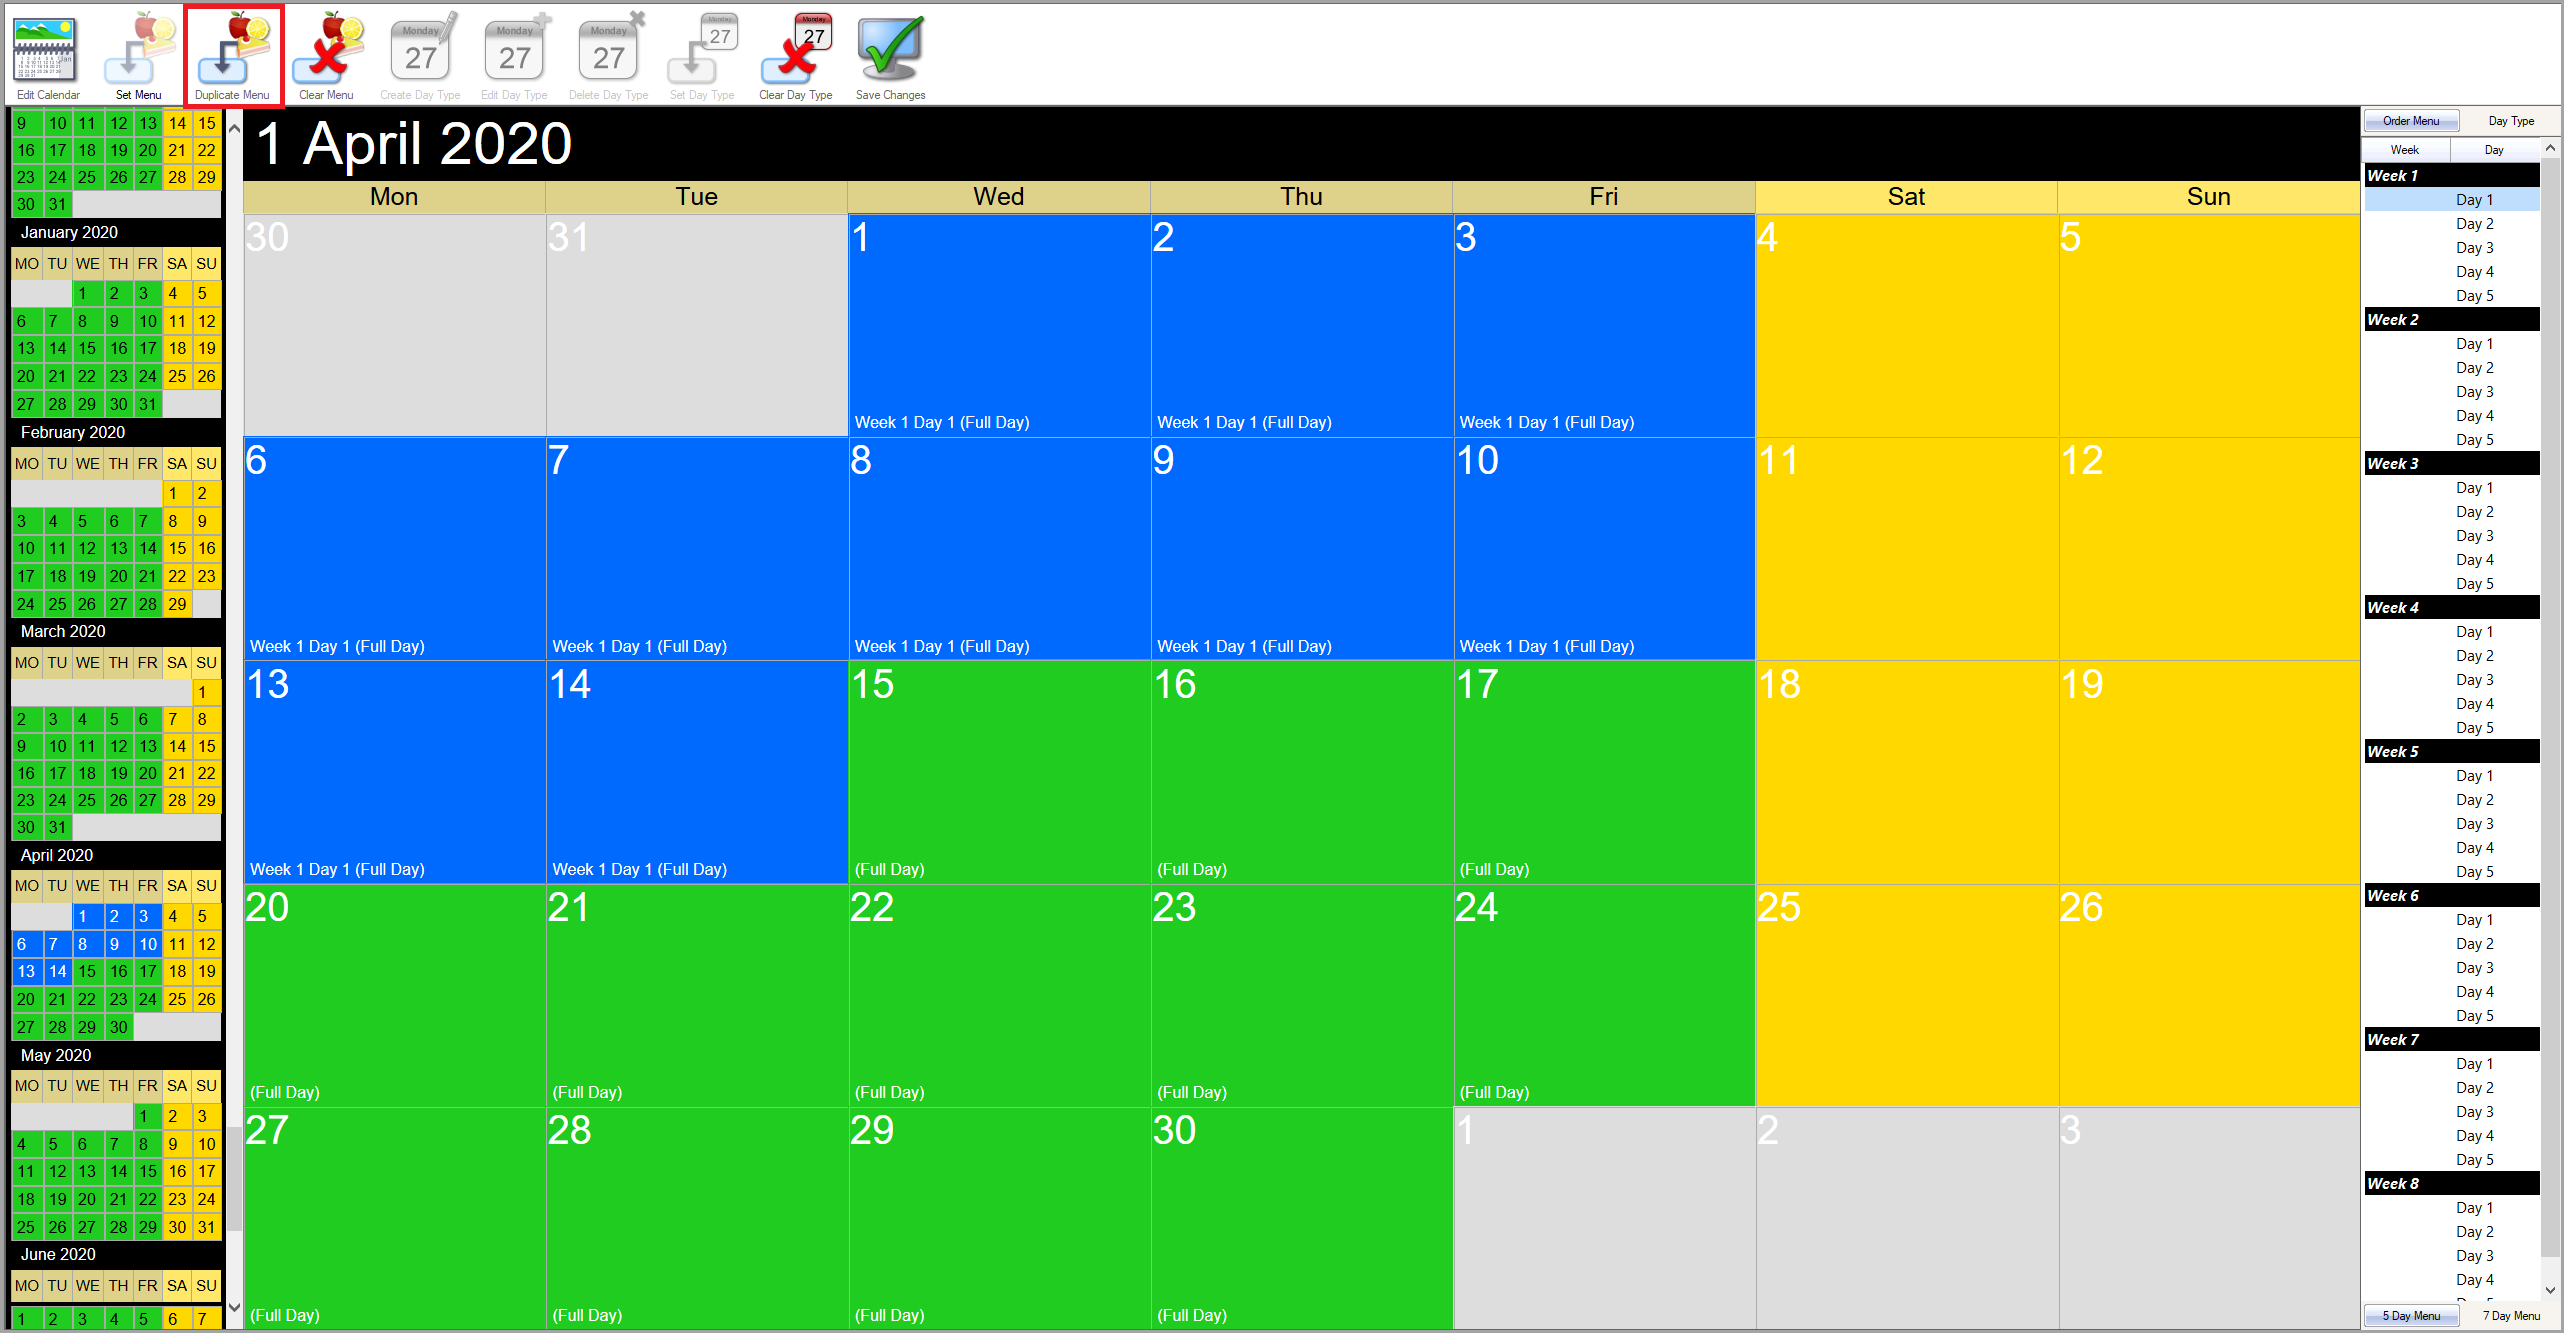
To set a rotating menu, you first need to select the day that you want the rotation to start on. On the right, highlight the first menu you would like in the rotation. Hold Shift on your keyboard and then click the last menu you want in your rotation, an example on setting a three week menu is shown below:
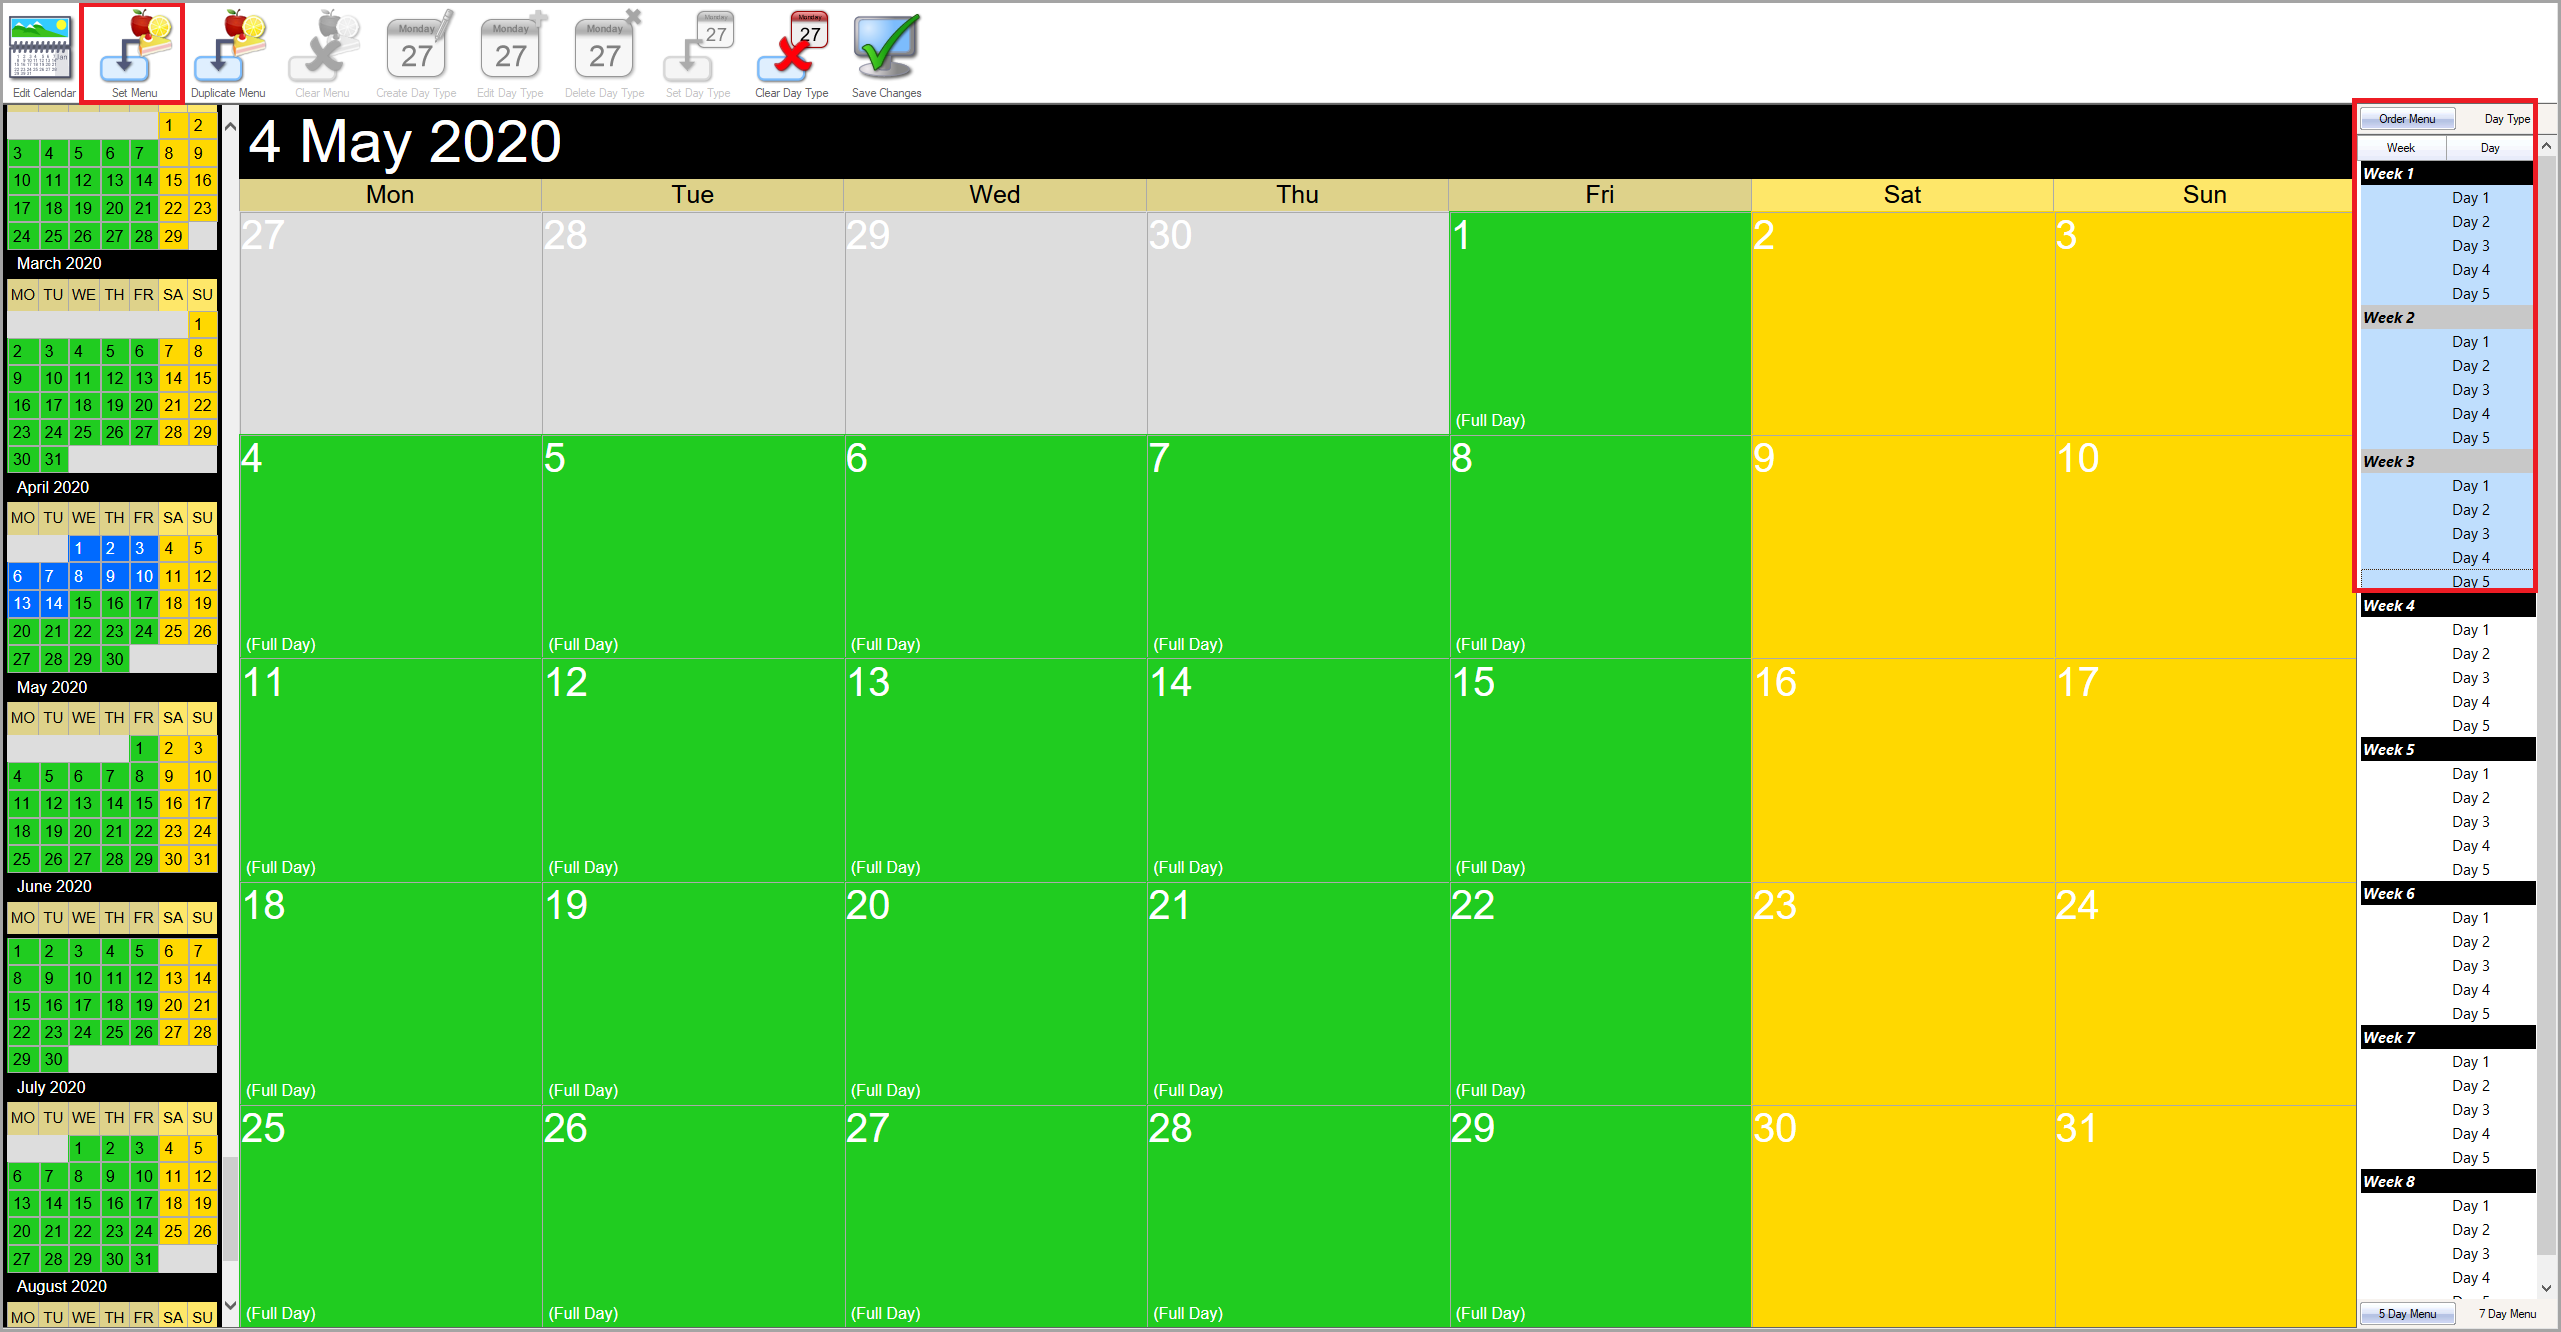
To have this rolling over multiple times (e.g. for the year), use the Duplicate Menu button after you've set the menu and set how many times you want the menu to rotate through your selection.