Manually Create an Account in ID Manager
If your system has an automated method for importing new users (whether from a school MIS or via a generated CSV import) and the record should be imported via this method, then do not create a manual record otherwise you will create duplicate records.
Open the ID Manager Application.
Start ID Manager and login as a IRIS BioStore Super User or Administrator.
-
Select the People view, and then select Add Person from the toolbar.

-
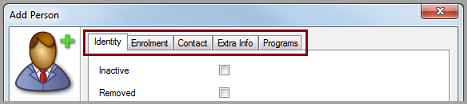
The Add Person window will appear:
-
Fill in details for the person as required. Each of the tabs across the top of the dialog box have different fields to fill in.
All fields marked with an asterisk * are required fields.
-
Under the Enrolment tab, ensure the person’s Access is set as required, e.g. Finger or Card.

-
To enable the person in any IRIS BioStore programs, ensure they are both Included and Enabled in the program. To do this, select the Programs tab and tick the two checkboxes for the relevant program.
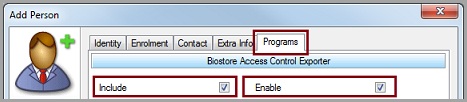
If IRIS BioStore is configured for more than one program, the Include and Enable check-boxes must be ticked for each program that the person will have access to.
-
Select OK to create the user, or Cancel to discard any changes. You can edit the person's details at any time by selecting Edit Person from the toolbar, or by double-clicking on the user.
If ID Manager is populated by your Management Information System (MIS), any changes you make to populated fields might be overwritten the next time people are updated. To stop this from happening, the person responsible for your IRIS BioStore implementation can configure IDGateway to ignore a certain field.