Purchase order settings
Purchase order settings are used to customise your purchase orders.
-
Go to Settings. (If you've switched to the new design, select your initials, then Account Settings.)
-
From Configuration Settings, select Purchase Order Settings.
-
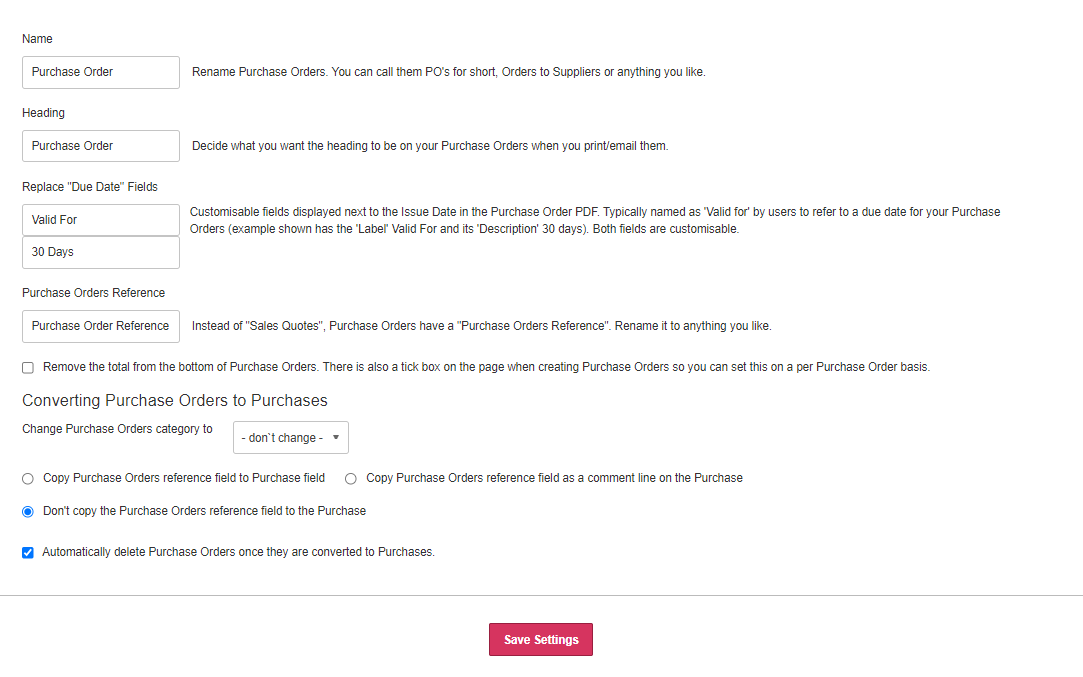
In Name, change how purchase orders are referred to. This changes the menu label. Enter the word in its singular form, e.g.
Purchase Orderrather thanPurchase Orders. - In Heading, enter the name to display at the top of purchase orders.
- In Replace Due Date Fields, change the label for Valid for followed by the number of days (defaults to 30 Days). Delete the text to hide this information.
- To include a reference, edit the label in Purchase Order Reference . Delete the text to hide this information.
- To hide any totals from purchase order PDFs, select Remove the total from the bottom of Purchase Orders. This is useful to issue a purchase order without totals, but shown them when converted to a purchase invoice.
-
From Converting Purchase Orders to Purchases, choose whether to copy the purchase order reference to the Purchase field, or comment line, or not copy.
-
Choose whether to Automatically delete Purchase Orders once they are converted to purchases.
-
Select Save Settings.