Create a Quick purchase invoice
Quickly generate a purchase invoice in IRIS KashFlow.
This functionality is only available once you have switched to our new design.
Please read 'Take a look at our new design' for further details.
-
Go to Purchases > Quick purchase invoice.
-
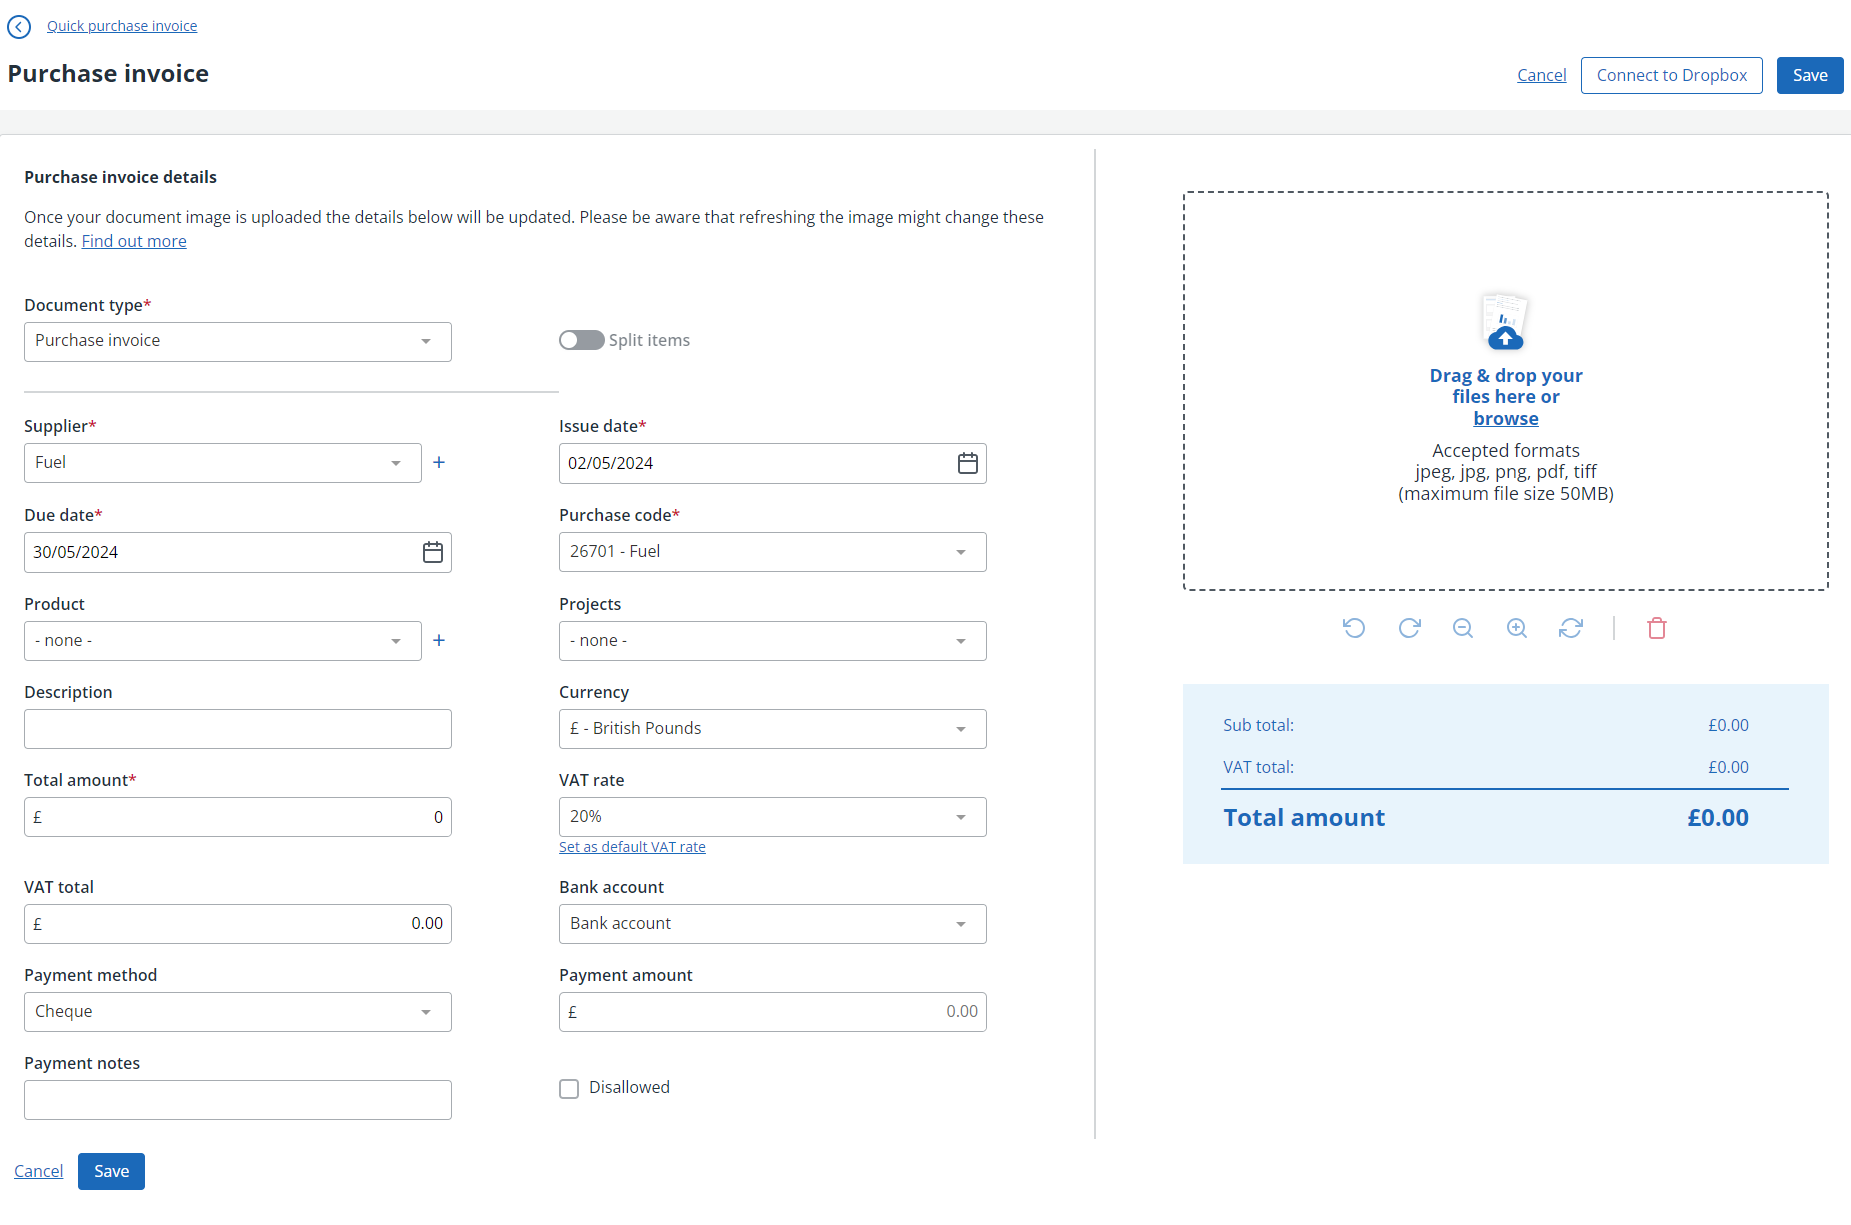
Drag-and-drop the invoice image or select browse and select the document from your files.
-
IRIS KashFlow will extract the data from the uploaded document and fill in the following details:
-
Amount
-
Supplier
-
Currency
-
VAT Amount
-
Issue Date.
The Due date will be set based on the default payment terms you can configure for all or individual suppliers.
-
-
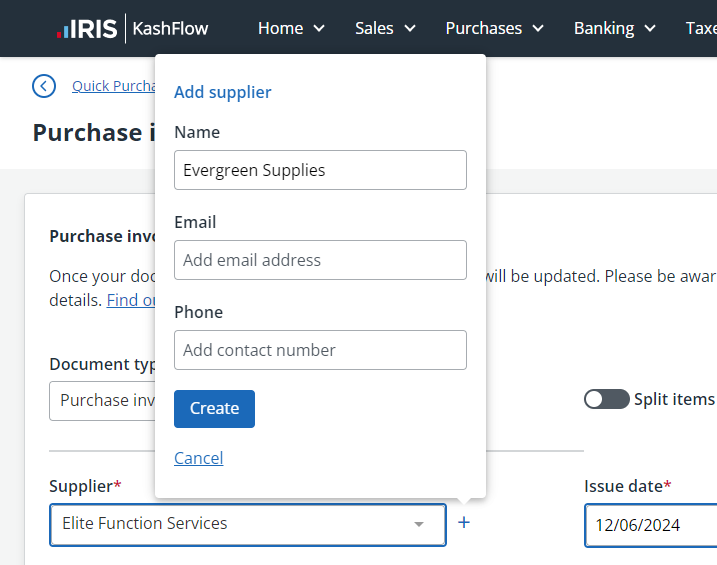
If the supplier listed on the invoice does not already exist in your system, IRIS KashFlow will prompt you to create a new supplier. The new supplier's name will come pre-filled, select Create to add them to your system.

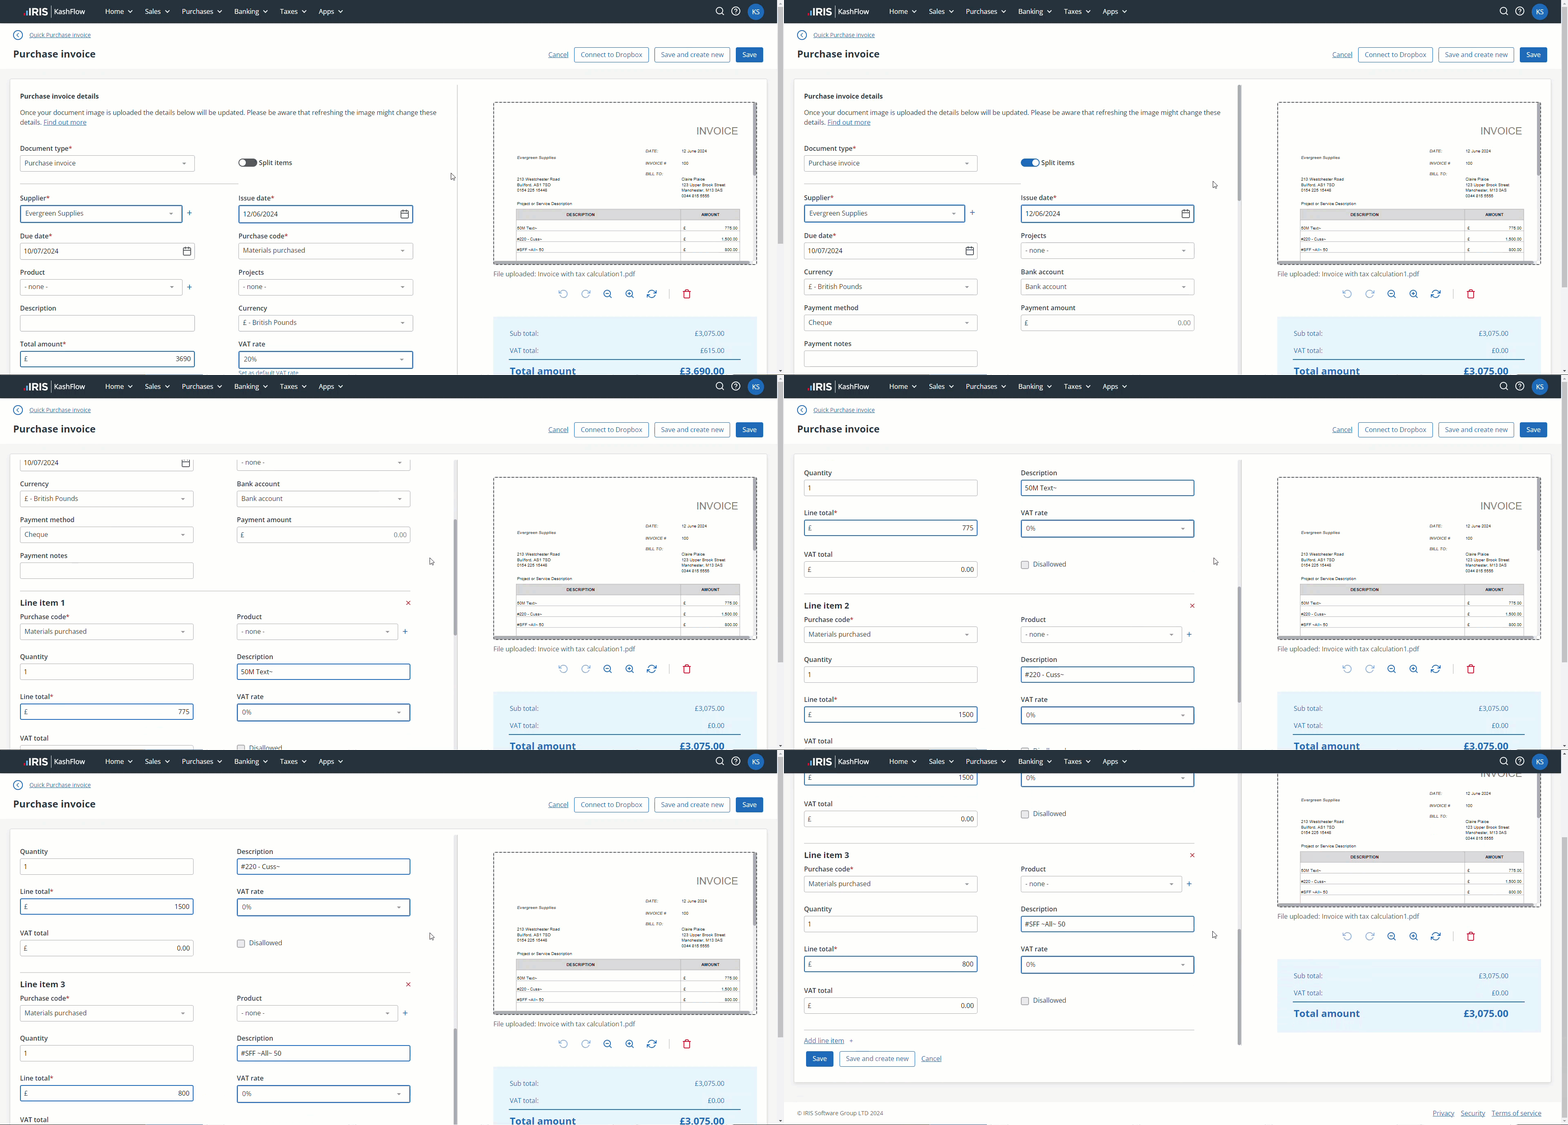
If the purchase invoice has multiple line items you can select Split items. This will capture and record all individual items separately before giving you a total.

You can upload JPEG, JPG, PNG, PDF or TIFF files. Maximum 50mb file size.
-
In the case where the currency of the invoice and your home currency don't match, the system will ask whether to convert the invoice to the new currency or to keep the same values and change only the currency symbol.
-
You can review the data filled in and make modifications as needed.
If you have chosen to Split items select Add line item + to add a new line. Select the red cross,
, to remove a line item.
The Sub total, Tax total and Total Amount will recalculate as you add, remove or adjust line items. Line item numbering updates as lines are added or removed.
Note: You cannot remove a line item if it is the only entry on the purchase invoice. -
To add a payment to the created invoice, select the Bank account, Payment method and Payment amount.
-
Once you've confirmed that all details are correct, select Save.The newly created sales invoice will be displayed. Alternatively, select Save and create new to reset the form for capturing another sales invoice.
A Dropbox connection is required to save your uploaded images.
