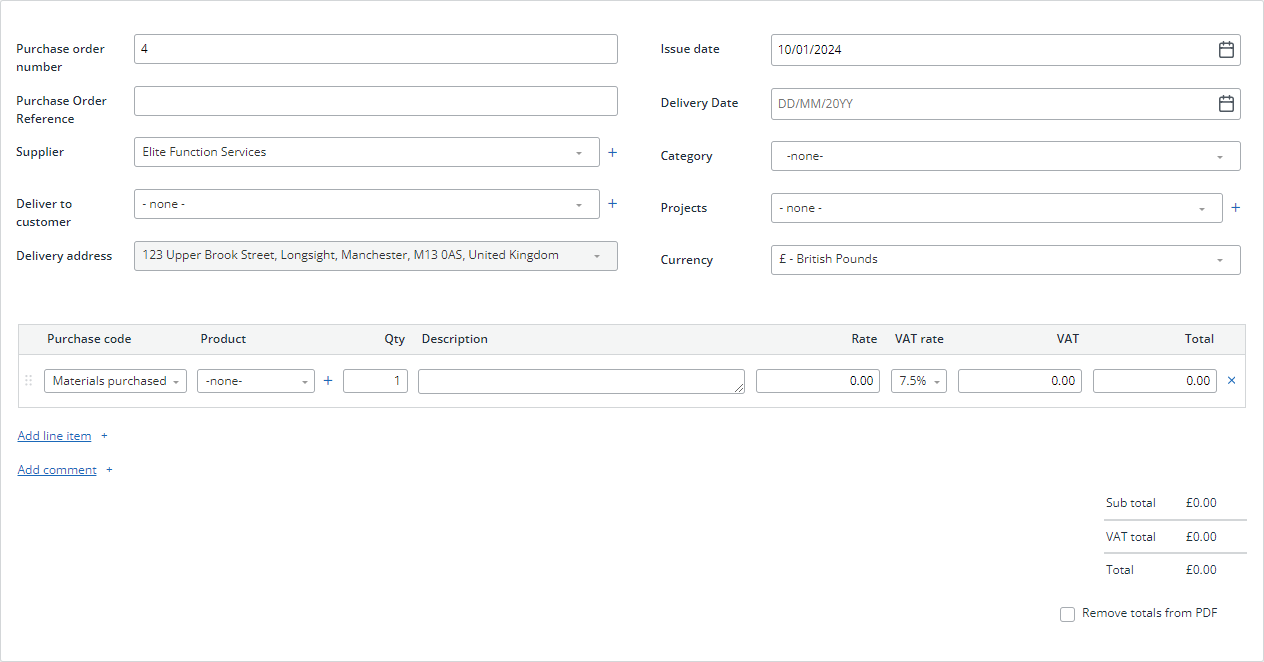
Create a purchase order
Purchase orders are used to formally advise suppliers the products or services you intend to purchase from them.
The images and steps in this topic are based on our new design (which you can currently switch on and off). If you haven't switched the new design on, the images may look different.
Make sure you have checked your purchase order settings before proceeding.
-
Go to Purchases > Purchase orders. The purchase order list is displayed.
-
Purchase Order Number is populated with the next available number which can be changed as long as it does not already exist.
-
Enter a Purchase Order Reference if you have been sent one by the supplier.
-
Select the Supplier from the list. Alternatively select + to create a new supplier.
-
Select a customer from Deliver to Customer if you want to send your ordered items directly to a customer. Alternatively select + to create a new customer.
-
By default, Delivery Address defaults to the company address.
If you want the goods delivered elsewhere select the field, enter the postcode and select Find address. Alternatively select Enter address manually to type in the address.
-
The Issue Date defaults to today but can be changed.
-
In Delivery Date, select the date you want the good to be delivered.
-
You can use categories to help you keep track of the status of your purchases. Select the required Category from the list, such as Draft.
-
If you have are using projects, select the required Project from the list.
Projects enable you to track the income and expense related to a specific project. This could be a specific project for a customer or a project for you, such as a shop fit.
-
Select the Currency to use for the purchase order, if different to your default currency.
-
Select Add Line Item to enter the order details.
-
Choose the required Purchase Code from the list.
-
Select the Product from the list or add a new one.
-
If you have enabled line level projects, select the Project to link the purchase to from the list.
-
Enter the Qty your want to buy together with a Description.
-
Enter the Rate (net unit price) for the purchase.
-
If you are VAT registered, select the VAT Rate being charged. VAT is calculated amount based on the Rate and VAT Rate, but this can be changed.
If you have enabled a default VAT rate for the selected supplier it will be automatically selected.
-
The Total is the sum of Rate and VAT. You can enter a different value here and IRIS KashFlow will recalculate Rate and VAT accordingly.
-
Select Add comment if you wish to record any additional notes.
-
Repeat these steps for any additional items, then select Save.
