Enable the IRIS KashFlow REST API
The images and steps in this topic are based on our new design (which you can currently switch on and off). If you haven't switched the new design on, the images may look different.
The REST API allowsIRIS KashFlow and a third party program to talk to each other and exchange data. To make API calls toIRIS KashFlow, you must embed an access token into the header of each call.
Our API tokes are generated using oAuth2 in line with the The OAuth 2.0 Authorization Framework.
Request a client key and secret
-
Log into IRIS KashFlow.
If you are accountant or partner, log into IRIS KashFlow Connect and go IRIS KashFlow to for any one of your clients..
-
From the top menu go to Apps, then select Apps.
-
Select API Settings from the top menu.
-
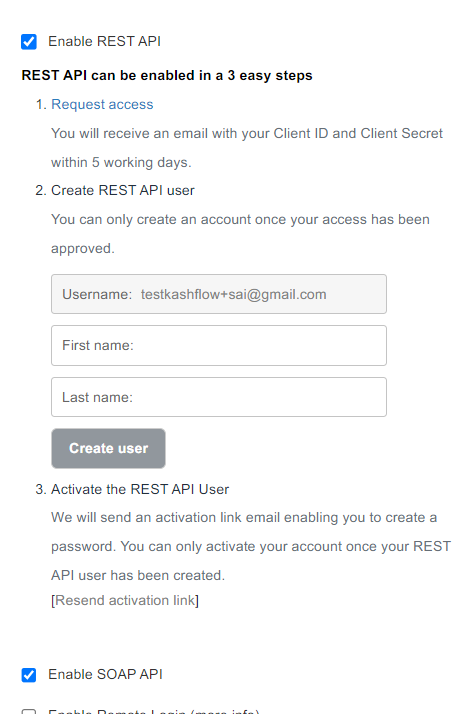
Select Enable REST API. Further API settings are displayed.

-
Select Request access. A confirmation email is sent. A member of our admin team will contact you to understand your requirements.
-
An email containing your Client ID and Client Secret will be sent within 5 working days.
Create a REST API user
Once you have received your Client ID and Client Secret, you then need to create a REST API user. You can only activate your account once your REST API user has been created.
-
From the top menu go to Apps, then select Apps.
-
Select API Settings from the top menu.
-
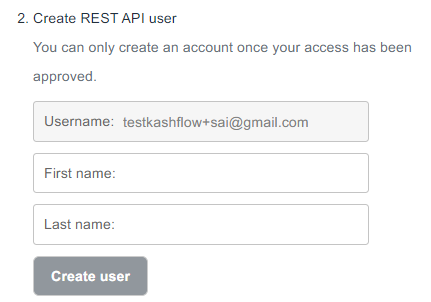
Go to Create REST API user and enter your First name and Last name.

-
Select Create User.
-
An email is sent enabling you to create a password. If required, you can Resend activation link.