 |
 |
|
|
The Backup and Restore function contains the following options:
Quick - this option will take a “quick” zipped copy of the data and By default the three backup files are placed in C:\Program Files\PTP\PTPData\Platform\BACKUP* in the folder of the relevant day of the week.
External - this option copies the database to an external location.
Scheduled - this option automatically backups up the database at a specific time to either the default location or an external location.
Click on a link below to jump to a particular section:
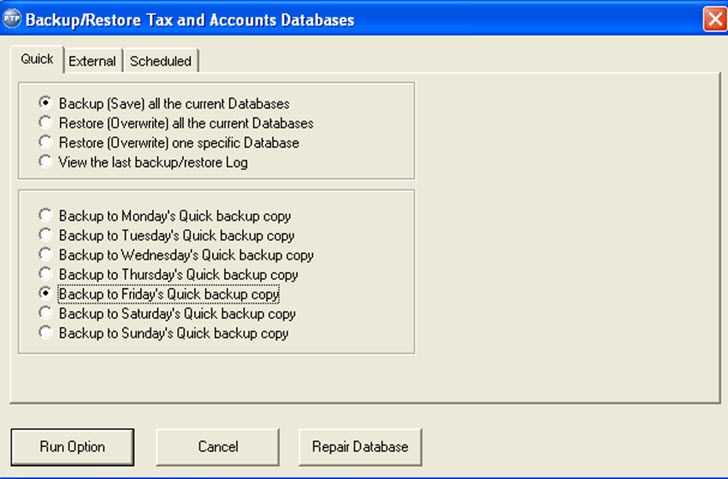
Log on to PTP Tax Platform and select the Backup/Restore Tax Database option from the tool bar to access the Backup/Restore Tax and Accounts Database screen.
By default the Backup (Save) all the current Databases is enabled as is the day of the week.
Click Run Option to begin the backup process.
Log on to PTP Tax Platform and select the Backup/Restore Tax Database option from the tool bar to access the Backup/Restore Tax and Accounts Database screen.
Enable the Restore (Overwrite) all the current Databases option then select the required day and click Run Option.
The date and time that backup file was made will be shown, click OK to proceed.
Once the progress bar has reached 100% the Restore Successful prompt will display, click OK to continue.
Whilst the default setting is to restore all current databases is it possible to overwrite a specific one. However, this is NOT recommenced as it may lead to issues with inconsistent data. In order to avoid this option being used in error users are required to contact PTP by phone to obtain a Restore Key and Security Code before proceeding.
Log on to PTP Tax Platform and select the Backup/Restore Tax Database option from the tool bar to access the Backup/Restore Tax and Accounts Database screen
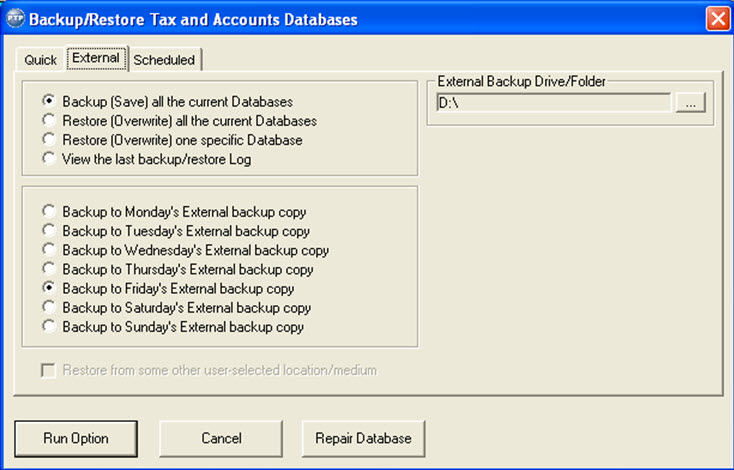
Select the External tab to access the following options.
By default the Backup (Save) all the current Databases option is selected as is the day of the day of the week.
Backups may only be made to removable drives or a remote network drive. If, in error, you select a drive (partition) on your workstation you are warned that you may not continue this action.
If this is the first time this disk has been used for a backup a prompt to erase any existing data and prepare the disk to be used as a Platform backup disk is generated, click OK to continue.
Once the progress bar has reached 100% the Backup Successful message is produced, click OK to continue.
When making an external backup PTP will remove any existing information within the selected location, including any non PTP related information.
Log on to PTP Tax Platform and select the Backup/Restore Tax Database option from the tool bar to access the Backup/Restore Tax and Accounts Database screen.
Enable the Restore (Overwrite) all the current Databases option and enable the Restore from some other user-selected location/medium option.
Click Run Option.
Use the Browse for Folder option to select the backup file.
Once the progress bar has reached 100% the Restore Successful prompt will be generated, click OK to continue.
Log on to PTP Tax Platform and select the Backup/Restore Tax Database option from the tool bar to access the Backup/Restore Tax and Accounts Database screen.
Select the Scheduled tab to access the following options.
Set the time that the backup should be made and enable the required days.
If the Quick option is selected the files will be saved in the default location - C:\Program Files\PTP\PTPData\Platform\BACKUP* in the folder of the relevant day of the week. If the External option is enabled- either select the Same as external tab or use the ... button to specify the location.
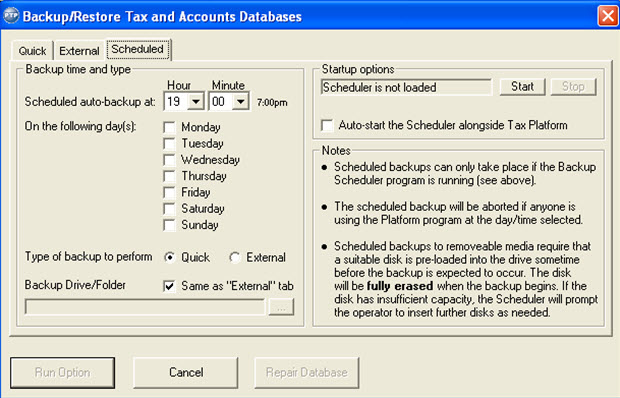
Click Start to begin the process and enable the Auto Start the Scheduler along side Tax Platform option.
Click the Cross icon to close this screen.
If the backup has been successfully scheduled the PTP logo appears in the Windows Taskbar situated in the in the bottom left hand corner of your screen. Click on this to check the status of your next scheduled backup.
When installing the PTP Platform Suite on a Vista or Windows 7 computer or peer to peer network (where the server is a Vista or Windows 7 computer) the default program and data locations will be C:\PTP as the program location and C:\PTP\PTPDATA as the data location. This is down to Microsoft’s Virtualisation system and increased security surrounding Program Files.