How to change events and progress description
Launch CT Platform.
Click the Spanner icon
located on the tool bar to access the configuration/firm details.
Select the Configuration/Web
Updates tab.
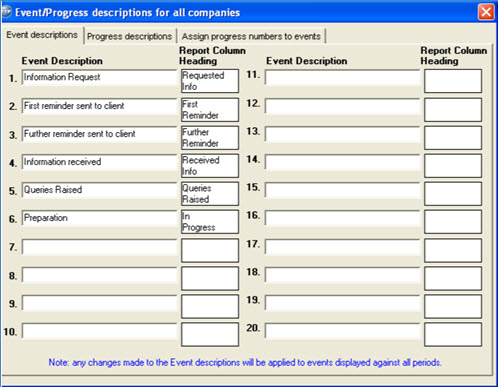
Click on Change Events/Progress
Description.
Customise the Event Descriptions as required for events 1 to
20 which are user defined events.
Events 21 to 27 are FBI Events and the description of these events is
not amendable).
The Report Column Heading is an abbreviation of the event description
which will be used as a title when generating reports.
All descriptions shown below are intended only for the purposes of illustration.
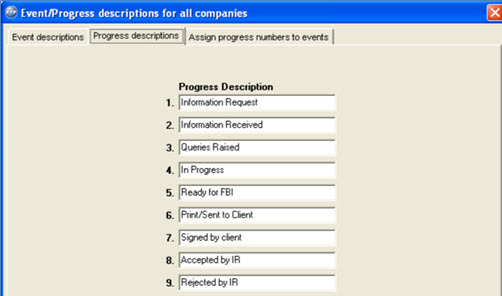
- Select the Progress Descriptions
tab and enter descriptions which will ultimately display in the Progress
column on the main Find Company tab.
- Select the Assign progress numbers
to events tab and select a description from the drop-down box
for the relevant events.
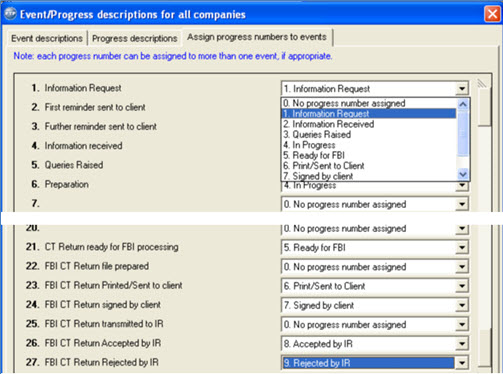
- After the completion of assigning progress numbers to events, click
Close.
- Use the Events screen, accessed from the CT600 Returns tab for
the relevant company, to enter target dates and, as each stage or
action is completed, enter the actual date of completion.
- For each accounting period being processed for each company it
is possible to set target dates for the completion of certain stages
in preparing and filing a CT Return.
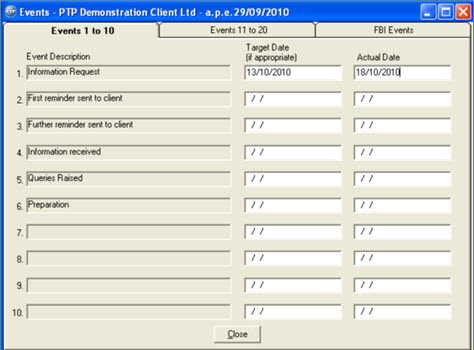
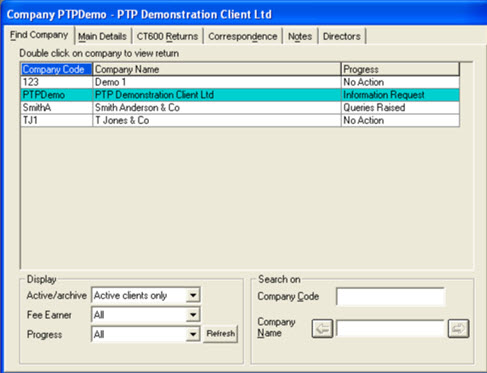
- Once the actual date is entered against a particular event, the
progress description that was assigned to that event, will display
in the Find Company tab.
As shown below, the progress description
for client code PTPDemo has changed from No
Action to Information Request.
This information can be used for producing reports, for example, for clients
with information request or a particular task which is outstanding.
Please see How
to Create User Defined Reports.