 |
 |
|
|
This topic explains how to import postings from one entry to another for the ‘same’ or a ‘different’ client.
If the Specify Posting Batch screen does not display or an alternative Batch type is required, within the Postings screen, select Batch Control | New It is recommended that users make a note of the posting numbers they wish to import prior to importing postings.
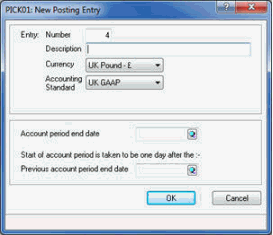
The following screen displays.
The following screen displays.
Enter 11 (Journals) in the Document Type field and click OK.
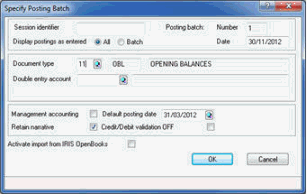
If the Specify Posting Batch screen does not display or an alternative Batch Type is required within the Posting Screen, select Batch Control | New PTPrecommends making a note of the posting numbers to import prior to importing postings.
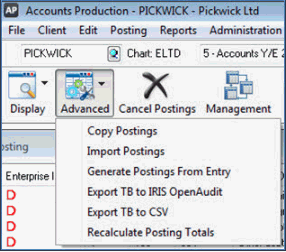
From the posting entry screen select Advanced | Import Postings:
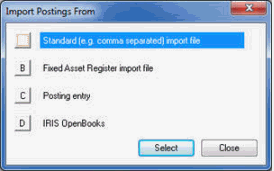
Select C - Posting Entry
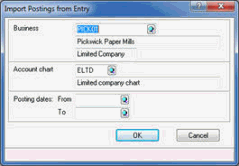
From the Import Postings from Entry screen confirm the client (shown in the Business field) to import from and click OK.
If required click on the magnifying glass next to the Business field to change the client you want to import from.
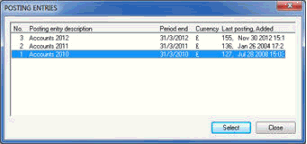
Highlight the Posting Entry and click Select.
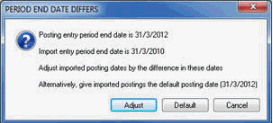
If the dates differ a warning displays. Select the appropriate option (Adjust/Default/Cancel).
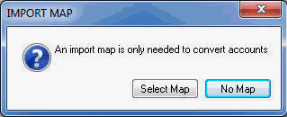
From the Import Map screen click No Map.
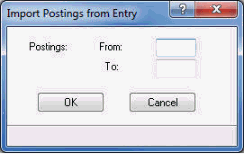
Leave the 'From' and 'To' fields blank to import all the postings in the post file entry.
The postings
imported are a COPY of those made in the other entry. Once imported
you may need to cancel the postings in the other entry. Alternatively
delete the entry itself within Posting
| Post File Maintenance | Entries.
Additionally when importing postings from one entry to another, PTP
will omit all previously cancelled postings. Users may therefore see
a smaller number of postings after importing.