 |
 |
|
|
HMRC have made some transitional arrangements for smaller charities. The format in which, Charity accounts are required to be submitted, depends on the size of the charity.
If a Charity has to prepare accounts under the Companies Act 2006 or Friendly and Industrial and Provident Societies Act 1968, users are required to file accounts and computations in iXBRL format. However, HMRC recognises that the accounting principles by which smaller charities prepare accounts mean that the accounts template, included in the free software provided by HMRC, may not be suitable. Until HMRC provides free software that is suitable for smaller charities, HMRC will continue to accept accounts from smaller charities in PDF format. Computations must be filed in iXBRL format.
A smaller charity, for the purposes of this arrangement is one where, together with any wholly owned subsidiaries (companies owned by the charity), the combined income does not exceed £6.5 million for the accounting period. Charities with a combined income above £6.5 million will need to file their Company Tax Return, Accounts and Computations in iXBRL format.
Click the links below to jump to a particular section:
Step 1 – Identifying Account/Group descriptions that have been Amended from the default settings
Step 2 – Tagging text within the Data Screens
Step 3 - Generating the iXBRL Accounts for submission to HMRC
Step 4 – Tagging report items within the Tag Editor
Step 5 – Reviewing the tagged iXBRL Report
Step 6 – Finalising the iXBRL Report
Step 7 – Creating a Submission for HMRC
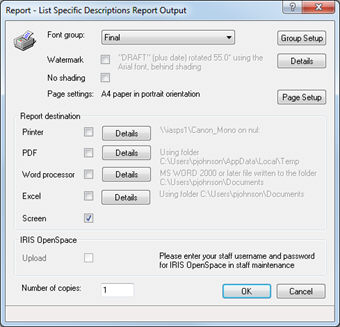
From the PTP Accounts Production menu, select Reports
| Account/Group Descriptions
The following screen displays.
Select the relevant options for each section and click OK.
This report enables users to see which account and group descriptions have been amended in order to change/apply the relevant tag. For example, if a posting has been made to the fixed asset motor vehicles account code but the description has been amended to read ‘Boats’, the tag from motor vehicles may need to be amended to a more suitable tag when sending the accounts to HMRC.
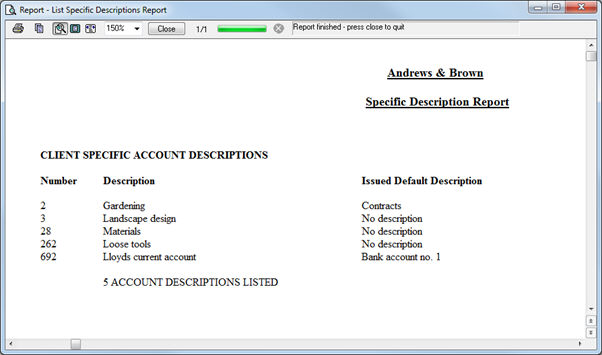
Close the report once the items have been reviewed.
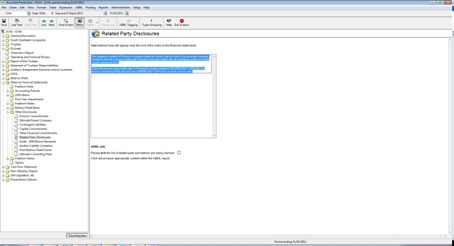
Select Edit | Data Screens
Select the relevant section of the reports to tag from the data screen branches. For example, select Notes to Financial Statements | Other Disclosures | Related Party Disclosures
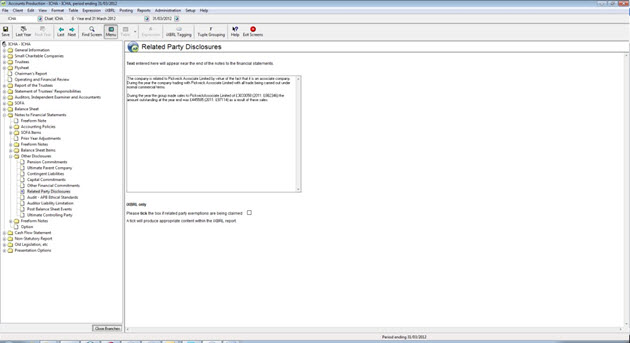
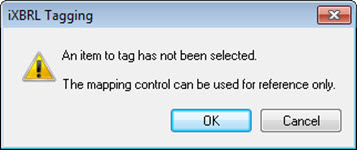
Highlight the text to be tagged.
Click the iXBRL Tagging icon at the top of the menu bar or right-click on the mouse and select iXBRL tagging.

The following screen displays.
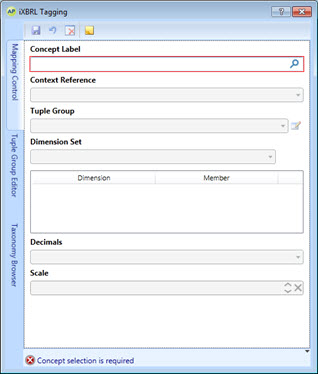
The following screen displays.
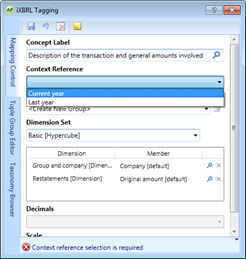
Select the relevant Context
Reference.
Click Save.
If the selected Concept label requires a Tuple Group, the following screen displays:

If the selected Concept label does not require Tuple Group, continue to step 12.
The following screen displays.

Double-click on the hash icon next to the green O under Group
Member mappings to confirm the mapping.
A new Tuple Group will be created and displayed within the Tuple Group
field as shown below.
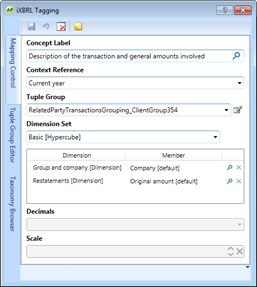
The data screen shows the text which has been tagged, highlighted in a
purple text box.
If other disclosures are required for tagging, select the appropriate data screen and complete.
Click Save to save the changes to the data screens.
Click Exit Screens.
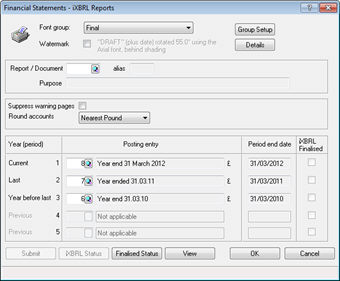
From the PTP Accounts Production toolbar, select Reports
| iXBRL
The following screen displays.
Enter the 3 character mnemonic in the Report/Document
field, for example, CHA.
(To display a list of reports available, click the magnifying glass next
to the Report/Document field.)
Confirm the correct posting entries have been selected by default or make your selection in the Current and Last field.
Click OK to generate
the accounts to the Tag Editor.
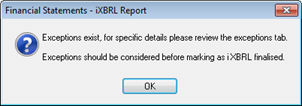
If exceptions exist within the report for specific details, the following screen displays:
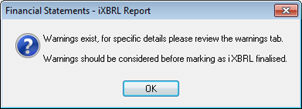
If warnings exist within the report for specific items, the following screen displays:
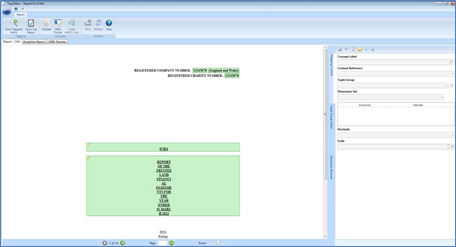
The Report – CHA tab displays the report that has been generated with tags applied and/or available to be tagged.
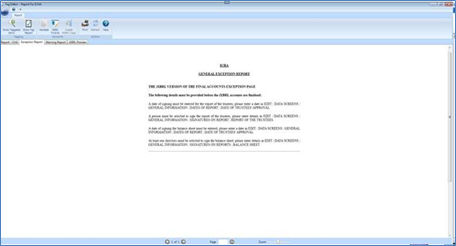
The Exception Report tab displays exceptions within the report that need to be modified before the iXBRL report can be finalised.
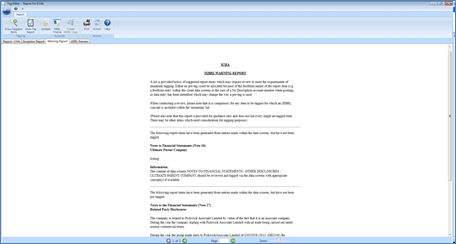
The Warning Report tab gives details of report items which have not been pre-tagged and may require manual tagging, if there is an appropriate concept in the minimum tagging list.
The iXBRL Preview tab displays the full report in a readable format that will be sent to HMRC.
Things to consider when tagging your iXBRL Accounts:
Concept labels for the totals
cannot be amended (for example, total incoming resources, total resources
expended).
Pencil icon next to the Note (on left) indicates that the concept label
of the notes can be amended.
If required, reports can be printed from the iXBRL preview tab, not
from the Reports tab.
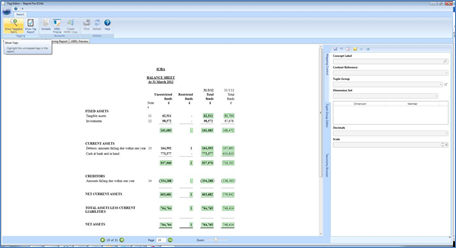
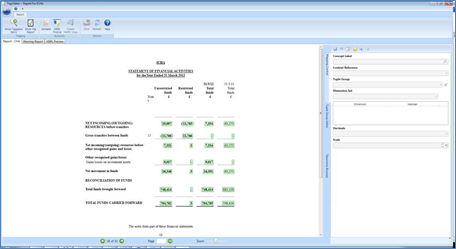
Within the Tag Editor screen, click the Report – CHA tab.
From the toolbar, click on the Show Taggable Items icon.
Click on the 
 arrows
to scroll to the next/previous page to review tagging.
arrows
to scroll to the next/previous page to review tagging.
Show
Taggable Item will show items not pre-tagged by PTP in BLUE
Hide Taggable Item will hide items not pre-tagged by PTP.

Select the item to be tagged, the box will then be highlighted
with a green outlined.

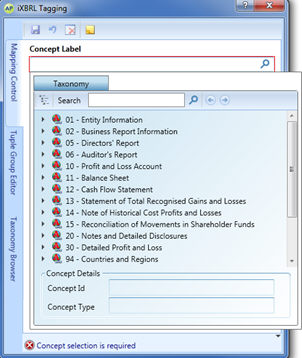
On the right within the Mapping
Control section, click the magnifying glass next to Concept
Label field.

The following screen displays.
The taxonomy is displayed in a presentation view, the tree structure relates to the report structure.
Apply default - This option allows users to revert the tagged item back to the PTP default; this option only applies to pre-tagged items of the report that have been amended.
Clear mapping – This option clears mapped tags that have been applied.
Show/Hide notes – This option allows users to show or hide notes.
Next/Back - This option allows users to select the next or previous item to be tagged.
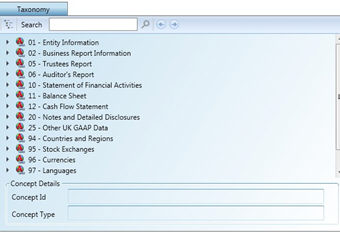
Items within the taxonomy are displayed in BOLD if they are part of the HMRC minimum tagging list and users are required to consider these items when tagging the report.
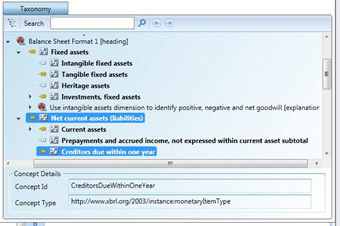
When selecting a concept label within the Taxonomy, users should be aware that if the tag icon (on the left hand side of the chosen concept label) is shaded in grey, then it is available to be selected. However if the icon is shaded in yellow, the concept label is already used in the report; an alternative concept label must be selected.
 Available
 Not available
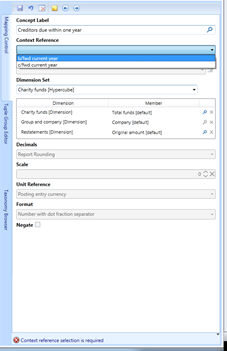

The Concept label selected may link fields in the Tag Editor, that is, Current year figure to Last year. Therefore if Yes is clicked, last year figure will be automatically tagged with concept label selected for current year. If No is clicked, users are advised to manually tag the last year figure.
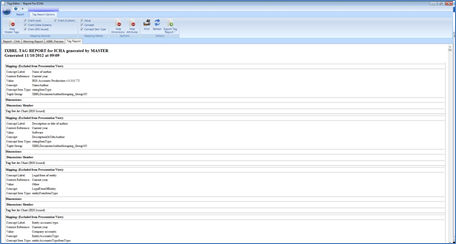
Selecting Show Tag Report will show the Tag Report as a new tab (window) within the main screen. The Tag Report displays an overview of iXBRL tags and associated attributes that will be contained within the iXBRL report created for HMRC. The report generated provides detailed information regarding all of the tags that have been applied for the client within the Tag Editor screen. This report is useful for audit purposes and can be exported as a CSV by clicking on the Export Tag Report icon.
The Tag
Report tab is generated:
If freeform text exists within the report, they must be reviewed and manually tagged with an appropriate concept label(s). The Warning Report will highlight these items if they are present within the report.
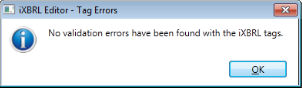
Click the Validate  icon.
icon.
The Validate icon is not available from the Tag Report tab.
Upon successful validation, the following message displays.
The Validate icon now displays as 

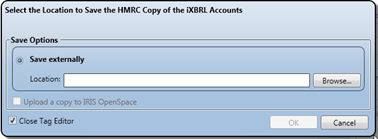
Click on the Create HMRC Copy.
The following screen displays.
Save externally – This allows the
iXBRL accounts file to be saved in a specific folder.
Click OK.
Click here for a glossary of terms
relevant to iXBRL.