 |
 |
|
|
It is possible that a concept may not provide enough detail about the report item which has been tagged. The Taxonomy therefore provides Dimensions which represent the different forms in which data may be reported. For example, Tangible fixed assets, at cost or valuation, start of period is associated with Dimension Tangible fixed asset classes. This Dimension allows the report item to be differentiated by allocating a member of, for example, Plant and machinery.
The same concept can then be applied to another report item which could then be allocated with a dimension member of Motor vehicles and so on. Typically, Dimensions may be thought of as representing the columns in a financial table, while ordinary tags represent the rows.
Within the Mapping Control, following the selection of a Concept Label, the Dimensions section will be populated with the appropriate Dimensions which relate to the concept selected (note this is defined by the Taxonomy).
This topic explains how to apply a dimension to items in the Tangible
Fixed Assets note.
Customer Support can only give guidance on the process to tag your iXBRL accounts. It is the user's responsibility to select the appropriate tags from the taxonomy.
Click the links below to jump to a particular section:
Step 1 - Identifying Account/Groups descriptions
Step 2 - Generating the iXBRL Report
Step 3 - Setting a Dimension
From the Accounts Production menu, select Reports
| Account/Group Descriptions
The following screen displays.
Select the relevant options for each section and click OK.
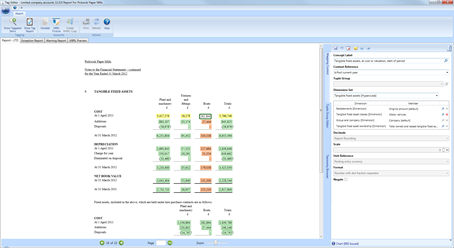
This report enables users to see which account and group descriptions have been amended in order to change/apply the relevant tag.
The Specific
Description Report displays:
The account description for account 523 has been changed from 'Plant and Machinery' to 'Boats'.
Close the report once the items have been reviewed.
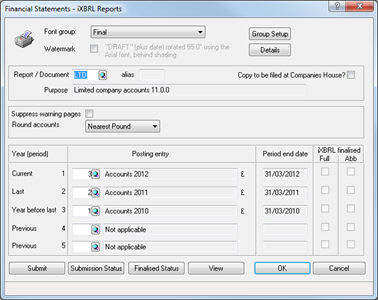
The following screen displays.
Enter the 3 character mnemonic in the Report/Document field,
for example, LTD, DOR
and so on.
To display a list of reports available,
click on the magnifying glass next to the Report/Document field.
Confirm that the correct posting entries have been selected by default or make your selection in the current and last field.
Click OK.
The Tag Editor
screen displays:
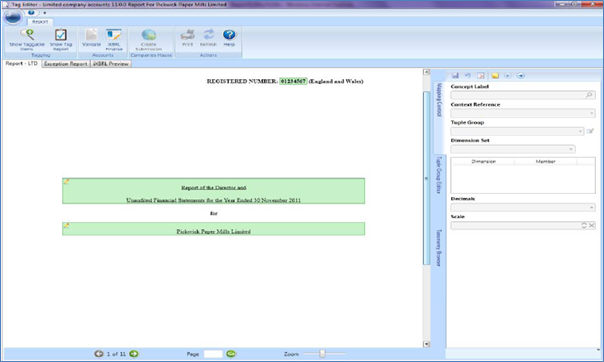
Taxonomy dimensions represent the different forms in which financial data may be reported. Concept Labels may only exist once in the taxonomy, but dimensions can be used to tag the different forms in which it is reported.
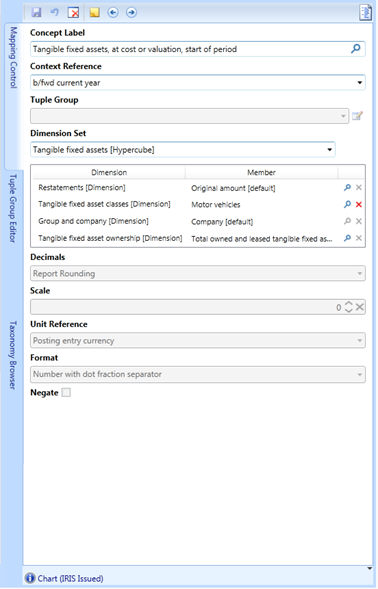
The Taxonomy groups selections of Dimensions together; XBRL refers to these groups as Hypercubes. Within the Mapping Control the Hypercubes which are associated with the selected Concept will be displayed within the Dimension Set field drop-down list. A default Dimension Set will be selected based on criteria of the Dimensions present. Where more than one Dimension Set is available for selection, it is the choice of the preparer to decide which best fits the report item being tagged.
Once the dimension member(s) have been specified, the details must be saved by clicking Save at the top of the Mapping Control (blue disk icon). Failure to do this will result in a warning message being displayed at the foot of the Mapping Control stating (X) Dimension(s) require a default to be selected.
Go to the note that requires a dimension member, for example,
'Tangible Fixed Assets note' and select the item.
The Mapping Control section
Displays.
From the mapping Control tab, identify the Dimension
which requires a dimension member.
Click the magnifying glass to show the list of options available,
as displayed below:
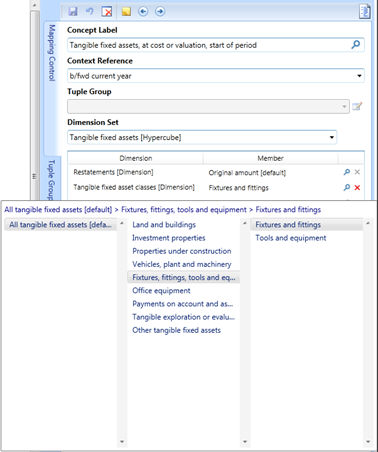
Select Boats or an appropriate item.
Any appropriate members will need to be specified for the relevant Dimension
by clicking on the magnifying glass and selecting the required member
displayed in the list(s). Where no members are required the [Default]
member will be automatically selected. If a Dimension does not have a
[Default] member then a member MUST be selected (these Dimensions will
be highlighted in red and the mapping cannot be saved until selection
is made).
The dimension selected will populate the member field it will be marked with a red cross. To delete the dimension applied please select the red cross option as follows:
Click No.