 |
 |
Using General Adjustments it is possible to transfer WIP from one client job to another client job. This can be used to move WIP balances for example, moving a credit WIP balance.
If individual postings, rather than WIP totals, are to be transferred between clients, see the Correcting Timesheet Postings topic.
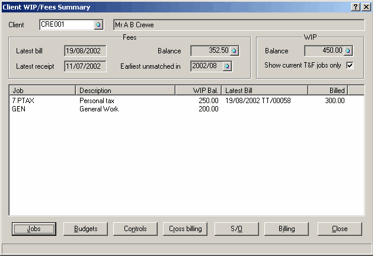
The first step is to decide on the value of WIP on each job to transfer:
Log into the Time Ledger.
Click Enquiries | Client Summary
Enter Client ID.
Check the WIP balance on the jobs and decide how much to transfer.
Click Close.
In this example £20 of WIP is moved from job 7 PTAX and put it on job GEN.
The next step is to post a credit General Adjustment to remove WIP from one job.
Click Post WIP | General Adjustments
Select the Period the posting is to go into.
From Posting Type select Credit.
Enter the amount to Credit in Amount (WIP).
Enter the Posting Date.
Enter the Client ID.
Enter the Job to remove WIP from.
Entering Work Type, Staff ID, Cost of WIP, and Narrative are optional.
Click Post.
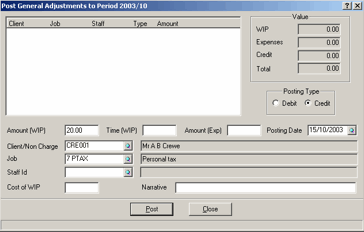
The credit posting displays at the top of the screen. The debit General Adjustment can now be posted.
Set Posting Type to Debit.
Enter Amount of WIP to add to the other job.
Enter Posting Date.
Enter Client ID.
Enter Job to add WIP to.
Entering Work Type, Staff ID, Cost of WIP, and Narrative are optional.
Click Post.
Click Close.
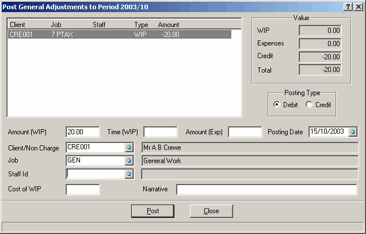
Now that the credit and debit general adjustments have been posted on different jobs, the Time Ledger needs to be updated:
Click Pending Queue | Update Ledger
Select Other Postings.
Click OK.
To check that the WIP balances on each job is satisfactory, Click Enquiries | Client Summary and enter the Client Id and you can check job WIP balances:
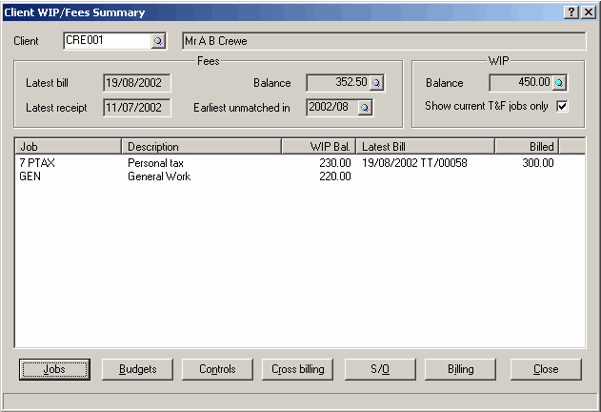
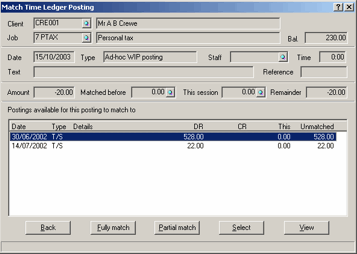
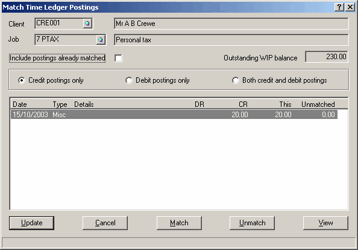
If you would like to match the postings made to transfer the WIP then click Post WIP | Matching and select Tidy postings to open the matching screen:
Enter the Client ID.
Enter the Job identifier.
Select the type of posting to display.
Highlight the posting to match.
Click Match.
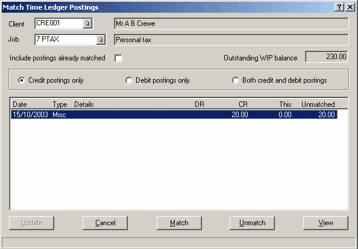
Highlight the posting you wish to match with.
Click Fully match.
Click Back.
