 |
 |
In IRIS Time and Fees there are various methods to post a credit note.
This topic explains each method. allowing you to find the most suitable for your business.
Credit notes can be posted to affect the time ledger in a variety of ways. If you do not want the credit note to affect the time ledger:
Go to the Fees Ledger | Posting | Ad hoc posting
Select the period you wish to post the credit note into.
The following screen displays.
Select Credit Note as the Posting Type.
Select the client, insert the date of the posting, the amount of credit you wish to post the reference and the relevant VAT rate.
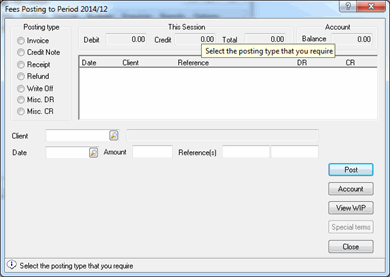
Click Post. The credit note will be posted to the fees ledger and will not affect the time ledger.
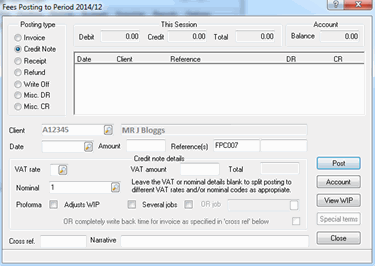
When you post a credit note that will affect the time ledger, you are able to do so in a variety of ways.
You are able to post a credit note that is cross referenced to the invoice originally posted to the time ledger.
This will unmatch the WIP originally written out by the invoice.
Go to Posting | Ad hoc posting
Fill in the details as before, but before you Post select the Adjusts WIP option and the completely write back time for invoice as specified in ‘cross ref’ below option.
With the option selected, in the Cross ref. field fill in the reference number that the credit note corresponds to, or press F2 to complete it automatically with the latest invoice raised.
Clicking Post, will unmatch the time and put it back on the time ledger as well as putting the credit on to the Fees Ledger.
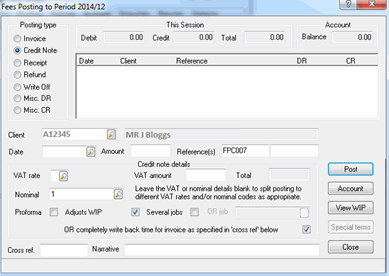
IRIS recommends using this method to post your credit notes.
There are two ways you can post a credit note to affect the Time ledger and not unmatch the WIP from the original invoice.
Either, send the full amount of the credit note or part of the credit note to the Time ledger. As a credit note is posted it automatically posts a debit in the time ledger to be matched against the original invoice.
These credit notes can be posted across different jobs.
Complete the details of the credit note as before.
Select the Adjust WIP option and select the job you wish to post the credit note to, or if you wish to post a credit note to several jobs, select the Several jobs option.
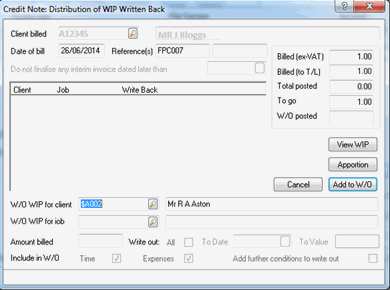
The following screen displays.
As with posting invoices, this allows you to choose how much you wish to post into the fees ledger and time ledger, even though they may be different amounts.
The Billed (to T/L) allows you to change the amount of the credit note that you wish to post to the time ledger.
Click Add to W/O when you are happy with the amount.
Once you have apportioned the entire credit note click OK.
It is advisable to match the credit note to an invoice in the Time ledger.
To do this:
Go to Post WIP | Matching | Invoices/Write offs
Select the client you have posted to and the job.
Select the original invoice that the credit note relates to from the list and click Match.
It will then give you a list of credit notes or time postings you can match it against, double-click on the credit note and click OK, then click Update.
Because the credit note has been matched to the original write out instruction it will reduce the recovery on that original invoice.
Below is an example of how the billing analysis will show the recovery of a credit note once it has been matched to an invoice.
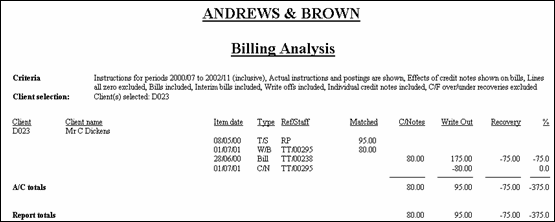
The above is an example of a Billing Analysis with the option to see the affect the credit note has on the invoice.
Below is the same report but with the option to see the credit note treated as unmatched.
