 |
 |
This topic explains how to add a new security role into your SQL instance. This role will grant specific users access to your IRIS SQL database. It is recommended that you consult your network administrator for advice prior to implementing any changes.
To apply the changes, the following steps must be carried out on the server:
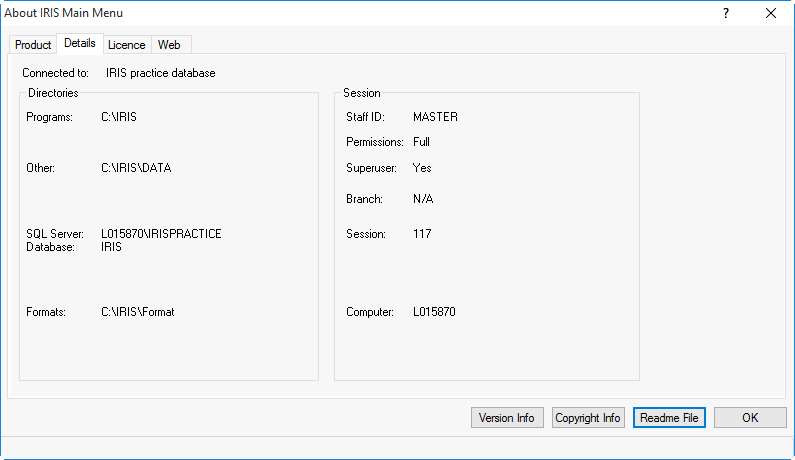
Confirm the server, instance and database name by opening the IRIS Main Menu | Help | About | Details tab
Make a note of the SQL
Server and Database values:

Open Microsoft SQL Server Management Studio. Click Start | All programs and find it in the menu.
Ensure the Server name is the same as noted
in step one, then click Connect.

Expand the tree and highlight your
IRIS database.
Example:

Click on the New
Query button. ![]()
The next step requires an SQL query. Click on the following link SQL Permission Script when the page opens copy the entire contents.
Within SQL
Server Management Studio, paste
the contents into the new query window.

Execute the script by clicking Execute.
![]()
Wait for the message to show it has been successful.

Check that it created the Database Role idr_BusinessViewUser

Sometimes you cannot see it immediately, try refreshing or closing out and going back in.
Add the users to the SQL server. Close the Databases branch and open the Security branch. Right click on Logins and select New Login.

Enter the user’s network username including domain, or use Search to find:

Click OK.

Add the users to the new database role. Close the Security branch and open the Database branch. Select the IRIS database | Security | Users
Right-click on Users and select New User.

Enter the domain\username of the new user. For example:

Within the Database role membership section, tick idr_BusinessViewUser
Click OK.
