 |
 |
|
|
Postings from IRIS Fees can be exported into IRIS Accounts Production.
Before you can start, you will first need to setup the export directory,
output definition file and your default nominal codes in the Fees Ledger.
You can then use the export facility to export your postings from Fees
and then import the postings into Accounts Production.
Click the links below to jump to a
particular section:
Setting Up the Export Directory
Setting Up the Output Definition File
Setup Your Default Nominal Codes
Using the Export Facility from Fees
Importing File in to Accounts Production
Export from Fees to Accounts Production
If you wish to export information from IRIS Fees you will need to set up this facility ready to be used.
On your system set up a directory you wish the export files to be written to For example; C:\IRIS
Log into IRIS as MASTER, and go into the IRIS Fees.
Select Options | System
and select the F/T tab.

Enter a database identifier; this is a 3 character identifier. It should be different at each site (if you have more than one office). This will be used as part of the default file name, and will help identify the files when they arrive at the central site.
Nominate the directory for the export files to go to, in the above we have used C:\IRIS
Click OK to exit this screen.
This will create the definition for the export file. What this means is it will decide what postings from the fees ledger will go into the file, and in what order.
In IRIS Fees Ledger, click on File | Posting export definitions
Click New.
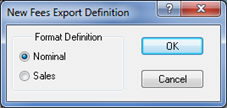
Select Nominal and click
OK.

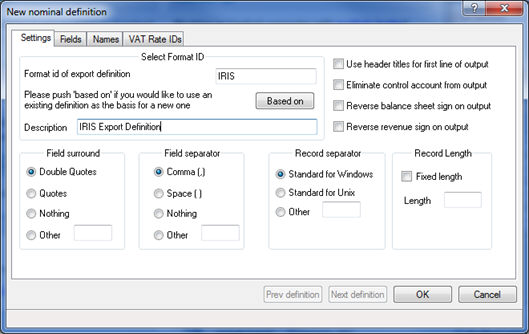
On the New nominal definition screen:
Enter a format identifier, for example as above this is IRIS
Enter a description of the export file.
Ensure Use header titles for first line of output is not selected.
Ensure Eliminate control account from output is not selected.
Ensure Reverse balance sheet sign on output is not selected.
Ensure Reverse revenue sign on output is not selected.
Select in Field surround the Nothing option.
Select in Field separator the Comma option.
For the Record separator select the Standard for Windows
For the Record Length ensure both boxes are empty.
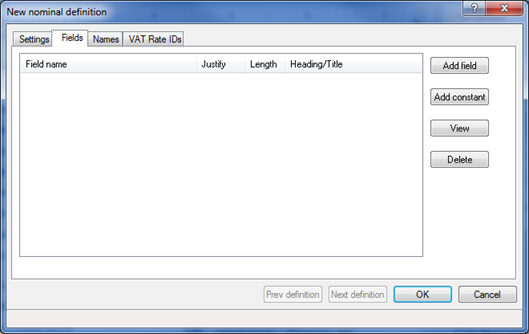
Once these options are set, select the Fields tab at the top of the screen.
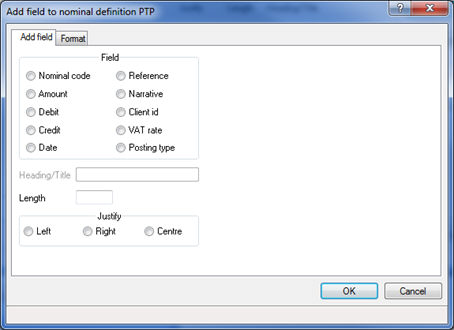
Select Amount for the Posting type field.
In the Length enter 12.
Select the Justify
to Right option.
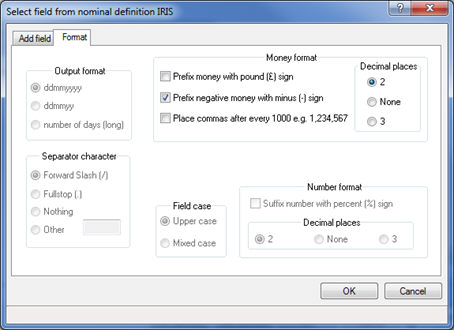
Ensure Prefix money with pound (£) sign is not selected.
Ensure Prefix negative money with minus (-) sign is selected.
Ensure Place commas after every 1000 for example, 1,234,567 is not selected.
Select 2 decimal places.
Click OK,
this will enter a line onto the New
nominal definition
screen.
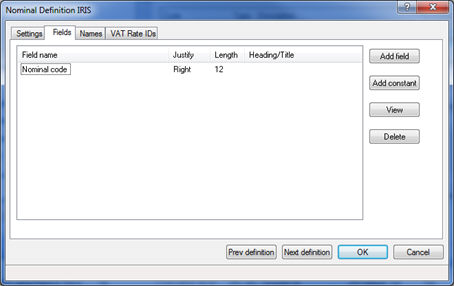
If you wish to add another Field:
To add the next field to be exported click Add field and select at end from the list.
Select the Nominal code field.
In the Length enter 12.
Select the Justify to Left option.
It is not necessary to select the Format tab in this case.
Click OK and this will enter the next line onto the New nominal definition screen.
Click OK to finish setting up the definition.
Click Close to leave the export definitions.
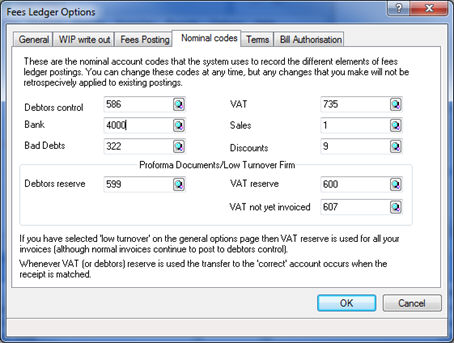
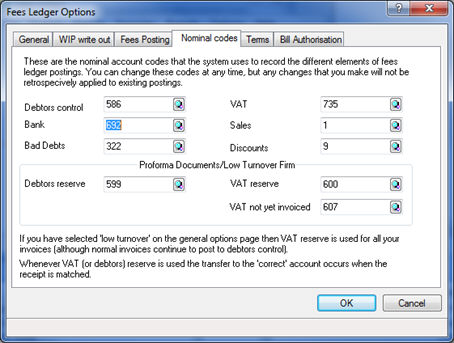
Click the magnifying glass on the field you wish to change.
Example, if you wished to change
the Bank account select the
magnifying glass to display the Nominal Accounts screen:
The following screen displays.
Click New.
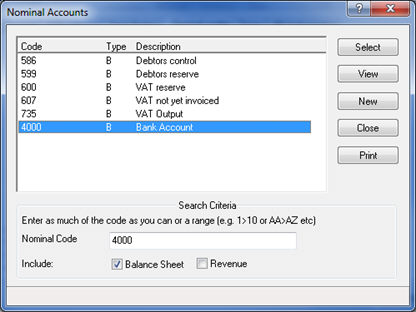
The following screen displays.
Enter the Nominal account code that relates to the Bank account in IRIS Accounts Production.
Enter the Description.
Select Balance Sheet.
Click OK, then click
Select to update the nominal
code and return to the Fees Ledger
Options screen.

This will change the system default nominal code.
Only postings made after this change will have the new nominal codes, therefore it is possible you may not be able to transfer postings made before.
Repeat this on all the codes you wish to change.
Click OK to close the Fees Ledger Options screen.
After you have posted your invoices, as and when you want, you will need to select the postings for transfer.
To do this:
In the Fees Ledger, select Posting
| Posting Export and select Export
postings from the list.
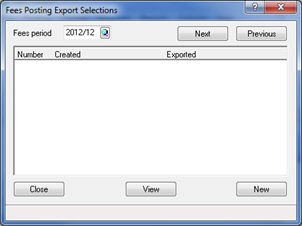
The Fees Posting Export Selections screen displays.
Ensure you have selected the Fees period containing the items you wish to export.
Select New.
The New Fee Export Batch in Period YYYY/MM displays.
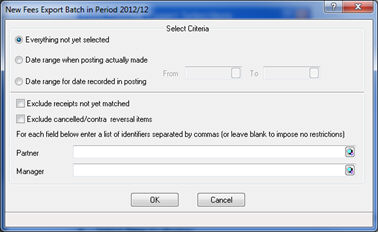
The options on this screen include:
Everything
not yet selected
If you are unsure, it is advisable
to select this option, as this will be sure to collect everything
in the current period you have not yet selected.
Date range
when posting actually made
This is the date that corresponds
to the time you made the postings. If you select this you will
need to enter a date range.
Date
range for date recorded in posting
This is the date on the postings, for example the invoice, receipt
date.
Exclude
receipts not yet matched
Only tick this if you are cash accounting. This will stop receipts
from being exported, that you have not sorted out the matching
on.
Partner
If you would like to restrict the output to a specific partner(s)
clients enter the partner(s) identifier(s).
Manager
If you would like to restrict
the output to a specific manager(s) clients, enter the manager(s)
identifier(s).
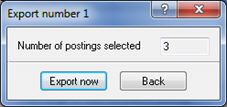
Back will take you back, allowing to do the Export at a later stage (by going in to IRIS Fees and clicking on Posting | Posting export | Export postings highlighting the list you wish to export, and selecting the View button).
Export Now will export the data to a file now, displaying:
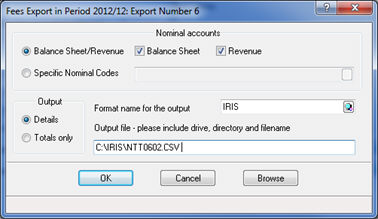
Select the Format name for the output by clicking on the magnifying glass, this will give you a list of the file definitions available. Highlight IRIS and click Select.
Ensure there is a tick in the Balance Sheet and Revenue fields.
Ensure Totals only is selected.
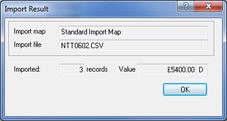
Make a note of the file name, as you will need this for importing
into IRIS.
In this case the file name is NTT0602.CSV (Please note you may need
to change the extension to .csv)
At this point you can select OK.
Once the file has been created you will be given the following message
– confirming the export was successful.
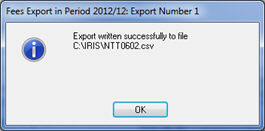
Select OK, and Close to leave the screen.
Once the file is created it remains to import the file into accounts production. To do this:
From the IRIS main menu Accounts production.
Select the client account you wish to post into.
Select Posting | Select,
select the posting entry into which the data is to be imported,
click OK.
The Posting screen displays.
On the toolbar click Advanced
and select Import Postings
from the list.
The Import Postings From screen displays
Select Standard (for example,
comma separated) Import file

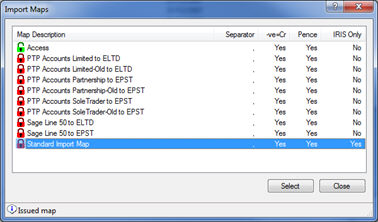
The Import Maps screen displays.
Select the Standard Import
Map and click Select.
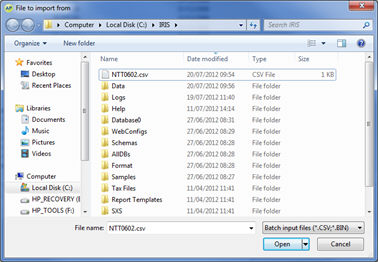
The File to import from browser
displays
Either enter the full path and name of the file in the File name field, for example, C:\IRIS\ntt0602.csv
or navigate to the CSV file created by Fees. Once you have found the
file click Open.
The Import Result message confirms the import details.
Click OK.
The imported postings are displayed in the Posting screen.
If after creating the batch you decide you would like to have a look at it before you do the transfer to edit the file you may. Editing the file will remove entries from it, so care is required. To do this:
In IRIS Fees Ledger click on Posting | Posting export | Export postings.
Make sure you have the correct period selected, and then click
View.
The following screen displays
If you want to de-select an item from the list highlight the
item and click De-select.
Take care when using De select all as this will deselect all records.
If you want to export the file from this point select the Export button.