 |
 |
The IRIS Elements Sync Control panel gives Practice Administrators the ability to control the client records that are migrated to IRIS Elements. Client records that are inactive, unwanted and/or deceased clients can be excluded from the sync process.
Customising the client list before migrating will ensure only Active clients are migrated. This is done by marking them as records to sync or not sync by selecting the check box beside the record.
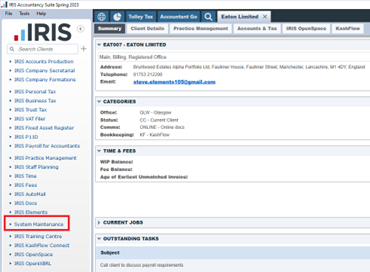
The new screen can be accessed via IRIS System Maintenance:
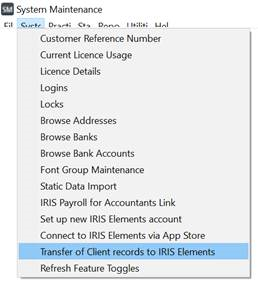
From System | Transfer of Client records to IRIS Elements
The Elements Sync Control Panel screen displays:
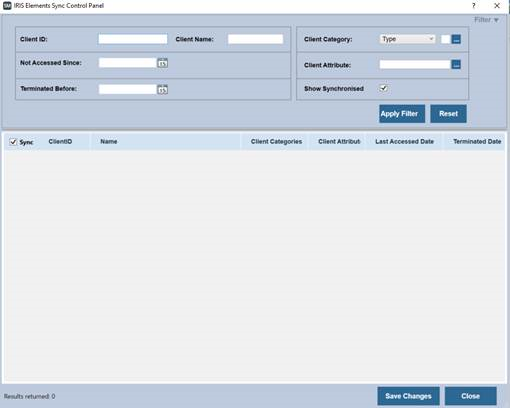
This new screen has the functionality to filter and sort records. You can limit the number of records you wish to transfer to IRIS Elements by applying any or a combination of the following filters then select Apply Filter or Reset (to clear selection):
Client ID - type in a client Id.
Client Name - type in a client name.
Not Accessed Since - the date the client record was last accessed. Data can be entered either by typing a date (DD/MM/YYYY) or using the calendar icon to the right of the filed.
Terminated Before - the date where the client record was terminated before. Data can be entered either by typing a date (DD/MM/YYYY) or using the calendar icon to the right of the filed.
Client
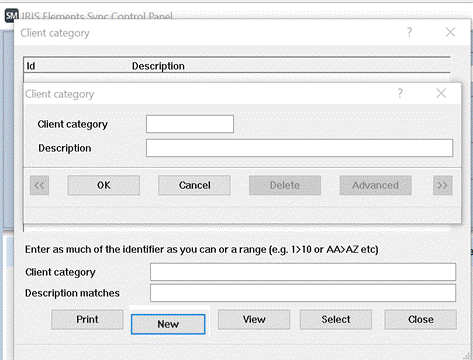
Category -
these are user defined and can set by clicking on the ellipse.

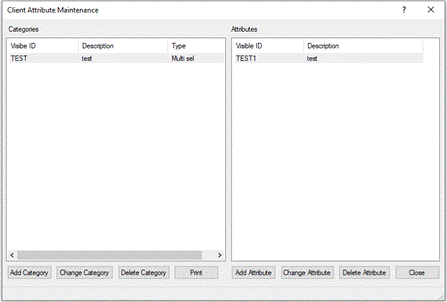
Up to 6 new Client categories can be defined on the Client category screen by clicking New and giving the Client category a name and a description.
Client Attribute - can also be user defined and are dependent on categories set.
You can sort the following fields by clicking the column headings to reverse / sort the order of the columns:
Client ID, for example, records prefixed with ‘Z, ZZ, ZZZ’ can be easily identified.
Client Name
Last Accessed
Once you have entered your filter criteria and clicked Apply Filter, records are returned based on criteria entered:
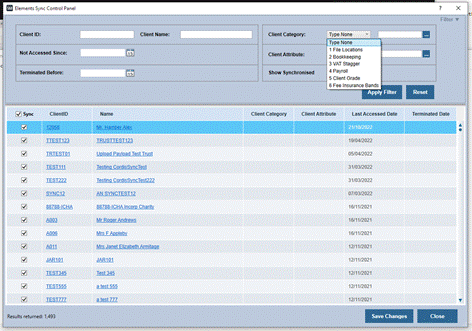
You can either select all records to be sync’d by ticking the Sync
checkbox or by ticking individual checkboxes associated with a client
record; unticking the checkboxes will not sync the record.
The Show Synchronised checkbox when ticked, will show records that are marked to be sync’d. Records are saved to the database based on the records displayed by clicking Save Changes.
The total numbers of records returned is displayed at the foot of the IRIS Elements Sync Control Panel.
As a registered IRIS Elements user you can access IRIS Elements via System Maintenance.
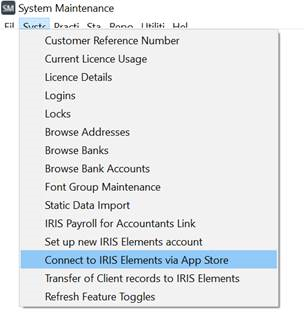
From the Main Menu | System Maintenance | System | Connect to IRIS Elements Via App Store
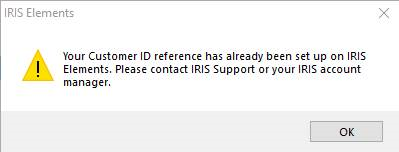
If an admin user has already connected with IRIS Elements, they will NOT be able to access the IRIS Elements Sync Control Panel this way:
If you haven't connected to IRIS Elements, as a registered user, you can access IRIS Elements via System Maintenance.
From the Main menu | System Maintenance | System | Connect to IRIS Elements via App Store

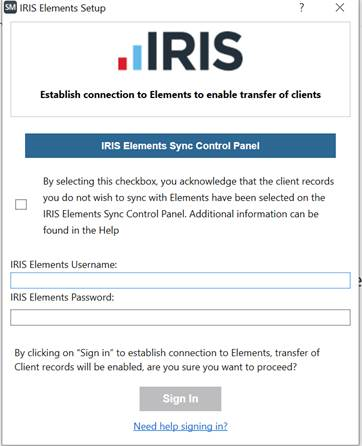
The following screen displays; the Sign in option will be disabled.
Select the checkbox. This is to accept that you are happy to transfer all records to IRIS Elements without performing the exercise to filter out records you do not wish to transfer by using the IRIS Elements Sync Control Panel.
At this stage, you can still perform the filtering exercise by clicking the IRIS Elements Sync Control Panel option; this will take you to the screen where you will be able to filter out records you do not wish to transfer to IRIS Elements.
You will be able to set the Client record status as Sync’d after the initial DataSync has been initialised if the status was previously set as ‘To be excluded from Sync’. This can be done by unchecking the ‘Exclude from IRIS Elements’ checkbox on the Client Maintenance screen.
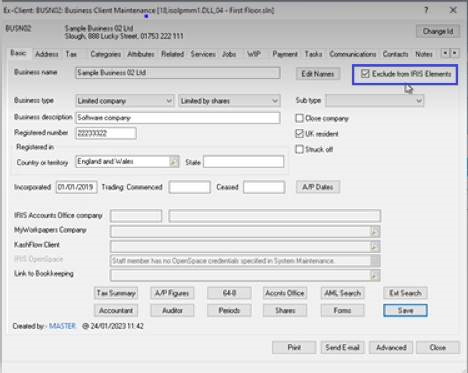
You will not be able to change the Exclude from IRIS Elements checkbox and sync status if the client record has been set to be included in the initial DataSync (that is, if the Exclude from IRIS Elements checkbox is unticked). This is because the client record will already exist in IRIS Elements.