 |
 |
In this Topic Hide
From the menu bar select Client | View
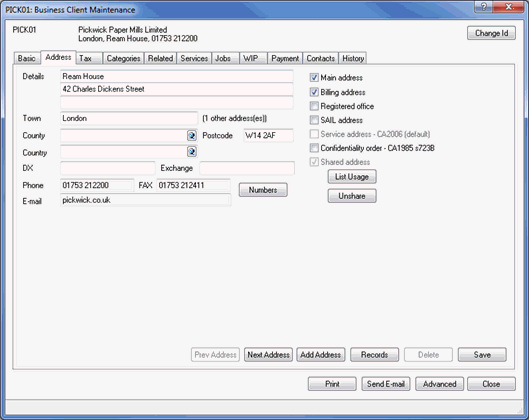
Select the Address tab.
Click Add
Address.

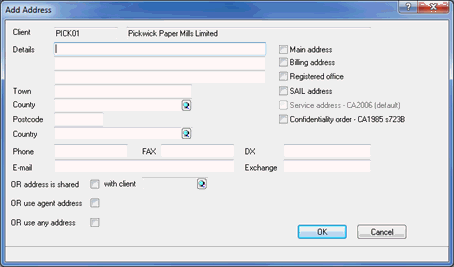
The following screen displays.
Enter the details of the new address, ensuring the Registered Office option is enabled. Alternately select the OR Address is shared options and add the client details in the with client field.
Click OK.

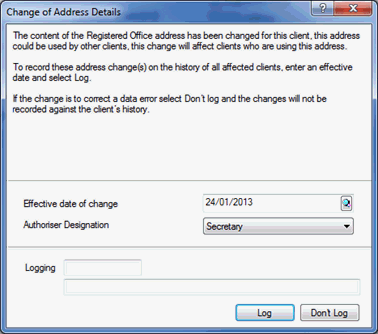
The following screen displays.
Enter the Effective date of change.
Select the Authoriser Designation from the drop-down list.
Click Log.
Click Save
and Close.

This will automatically activate a completed AD01.
To file the form electronically, follow the steps below.
Highlight the log for Form AD01.
Ensure the CH E-file option has been enabled.

The AD01 form will be generated in the IRIS PDF Viewer, please review the details and then exit from the form preview.
If you have a valid Practice Management license, the following screen displays.
If a log is required in communication tracking click Yes. If a log is not required in communication tracking click No.

The following screen displays.
If you are ready to submit the
form electronically to Companies House, click Yes.
To view the contents of the submission, click XML.
To cancel the submission, click No.

To paper file the form, follow the steps below.
From the menu bar, select Reports | Company Forms
Highlight the log for Form AD01.
Click Print
Form.
The AD01 form will be generated in the IRIS PDF Viewer, please review the details.