 |
 |
|
|
This screen enables a new client to be added to the IRIS database or an existing client registered for use within the selected product. Before adding a new client, check if the person has already been entered in the IRIS database using the Name/Surname field and Search option. The following details are specific to adding a person as a client but for all available new client options see New Client Wizard.
It can be found in:
Client | New within products where people are selected within the toolbar.
If the personal client is new to the IRIS database select Create a new client to be added to the IRIS database to enter their details manually.
Click Next to continue with the set up of the new client. Click Back to return to the previous screen. Click Cancel to exit the screen and abandon any changes.
There are several personal details which can be entered on screen. Minimum
requirements are for the Surname
and Gender to be completed. Client
information can be altered after it has been created as well as being
able to save more details such as the nationality, marriage records and
alternative addresses.
Full details for displayed fields are listed below:
Surname, forename, title and initials - the initials are auto-completed based on entries within the forename field.
Date of birth
Male or Female
Address
- enter the persons address in this field. This shall be marked as
the main and billing address. Alternative addresses can be added within
Client Maintenance after initial setup is completed. Click the magnifying
glass in the County field
to display a list of counties.
To use the address from another client on the database, leave the address
field blank and select OR address
is shared and enter the identifier of the client whose address
you wish to share in the with client
field. Click the magnifying glass to display a list of clients. If
two entities have the same address and the address is altered for
one entity the shared clients address is automatically updated.
Click Next to continue with the set up of the new client. Click Back to return to the previous screen. Click Cancel to return to the client browser.
The following screen displays several fields which can be used to categorise clients. Click the magnifying glass next to each field to display the available groups, staff or categories as relevant.
Configure the categories in Setup |
Practice Options | General tab or in Time
and fees go to Options | System
| General tab.
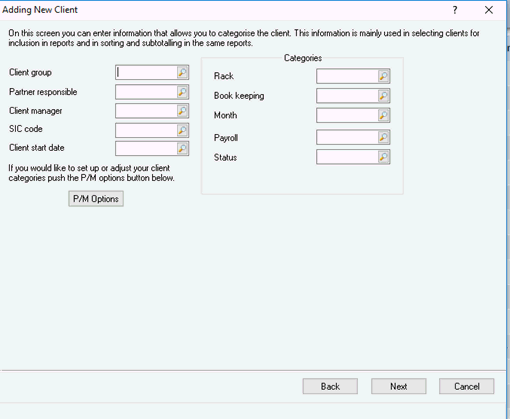
Click Next to continue with the set up of the new client. Click Back to return to the previous screen. Click Cancel to return to the client browser.
The final screen displays the basic details just entered for the new client. To amend any of the details click Back to return to the previous screen. If the information is correct click Finish and enter the Client Identifier required for the new client.
Once the identifier is entered click OK the Personal Client Maintenance screen is displayed confirming all the information that has just been entered as well as displaying additional fields for entering client specific data.