|
 |
|
|
Click the links below to jump to a particular section:
Setting up Partners’ Profit Shares
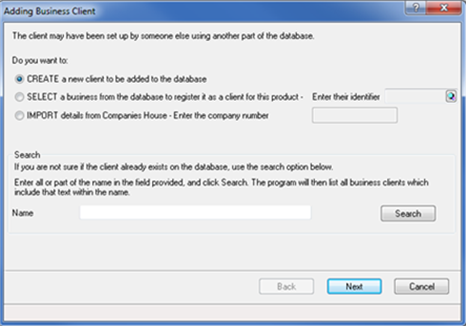
Log on to Accounts Production and from the menu bar, Client | New
The Adding Business Client screen displays.
Select the Create a new client to be added to the database option.
Click Next.
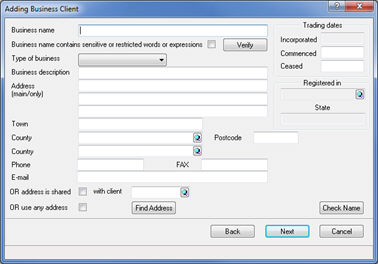
The following screen displays.
Complete the Business Name, Type of Business (select Sole Trader or Partnership) and Commenced fields in addition to any other relevant field.
Click Next.
The following screen displays.
Click Next.
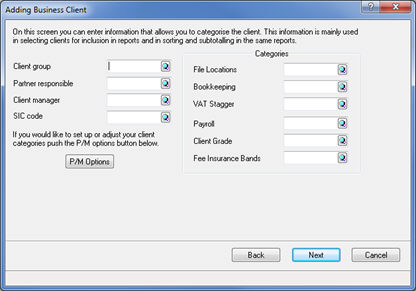
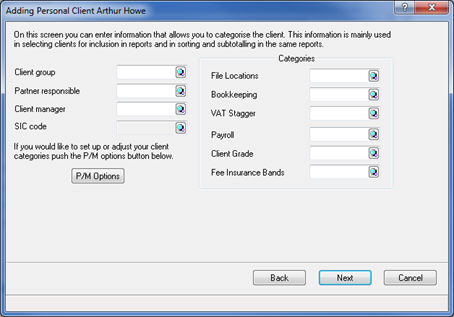
The above screen can be used to categorise clients according to Partners, Managers, and so forth. This does not need to contain any data.
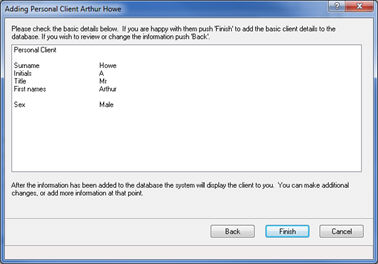
The following screen displays.
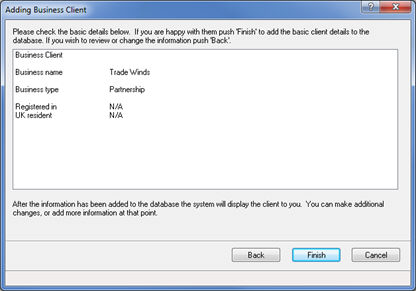
Review the data entered on the screen.
Click Finish to proceed
or Back to amend the details.
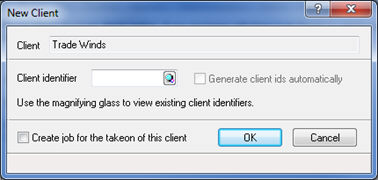
The following screen displays.
Enter a Client identifier reference for the client (maximum of 10 characters).
Click OK.
The following screen displays.
Click OK to generate
a letter or click Cancel if
a letter is not required.
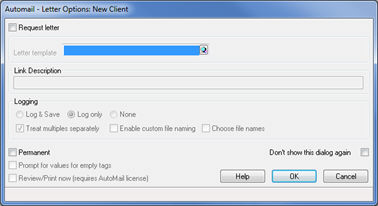
The AutoMail - Letter Options screen displays only if there is an existing Automail License.
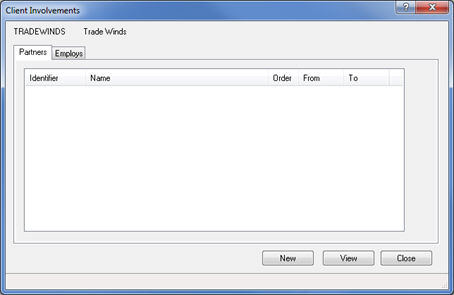
If Cancel is selected in step 11 the Client Involvements screen displays.
Select the Partners tab (or Proprietor tab in the case of a sole trader).
Click New.
The following screen displays.
Click the magnifying glass beside the Partner field.

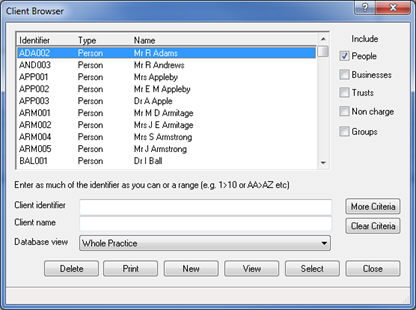
The following screen displays, listing existing people in the database.
Click New to add an
involvement if not shown on the list or click Select
to add an existing involvement.
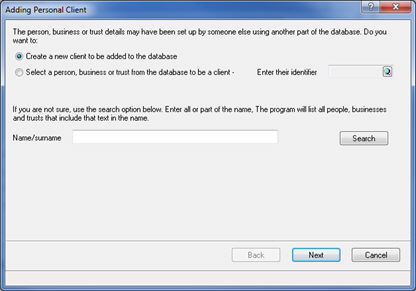
If New is clicked at step 4, the following screen displays.
Click Next.
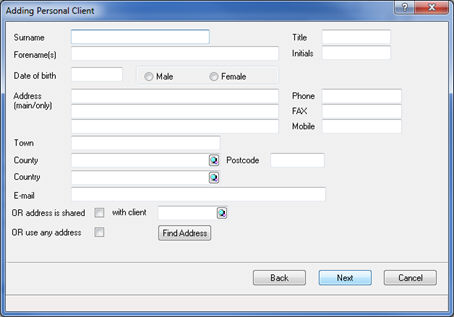
The following screen displays.
Complete the relevant fields and click Next.
The following screen displays.
Click Next.
The following screen displays.
Review the data entered on the screen.
Click Finish to proceed
or Back to amend the details.
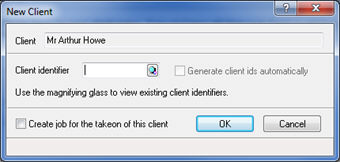
The following screen displays.
Enter a Client identifier reference for the client (maximum of 10 characters).
Click OK.
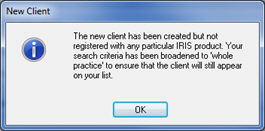
The following message displays.
Click OK.
The Personal Client Maintenance displays.
The Personal Client Maintenance screen gives a summary of the details entered. Any required amendments can be made by selecting the relevant tab.
Review the details.
Click Save
and Close.
The following screen displays.
Highlight the relevant involvement and click Select.

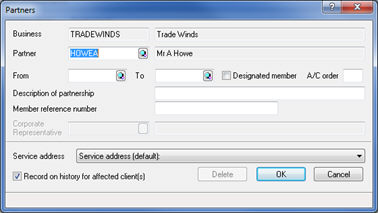
The following screen displays.
Enter the dates (if required) within the From and To fields.
Enter the account order number within the A/C Order field.
Click OK.
The Record on history for all affected client(s) check box is selected by default. The following message is displayed if no dates are entered. Click OK and either enter a date or deselect the Record on history for all affected client(s) check box.
Click Close, or New to add more partners, or select View to make any necessary amendments.
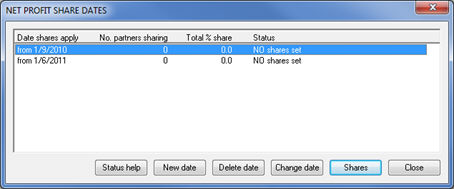
Once you Close out of the Client Involvements screen a NET PROFITS SHARE DATES screen displays and it will now be possible to allocate the shares of the profit to each partner.
This screen can be accessed at any time,
go to Edit | Partners Profit Shares
Enter the Date the partner net profit shares are to be effective
from and click OK.
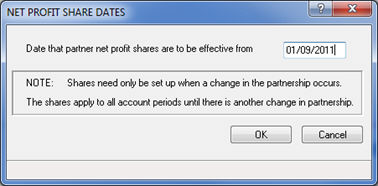
If you have not entered start dates for the partners this field can be left blank and shares will be effective from "start" of the business. If start dates were entered for the partners, then this screen will be automatically populated with that date.
The following screen displays, allowing the user to specify the percentage of profit each partner receives.
Select Joint capital account and either enter the identifier of the joint partner or click the magnifying glass to display the joint partner.
Click OK.
For the SPLIT of joint net profit share, select Equal if profits are to be shared equally or Specified and enter the percentage for each partner.
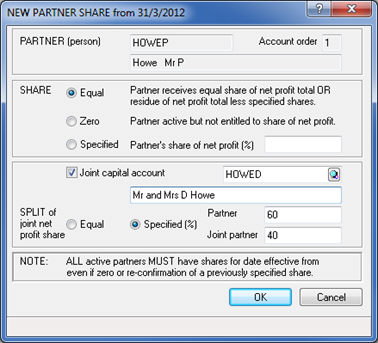
The New
Partner Share screen displays the details for the partner with
order number 1.
If Specified is selected then the user will be required to enter the
percentage of profit shared in the Partner and Joint Partner fields.
The following screen displays.
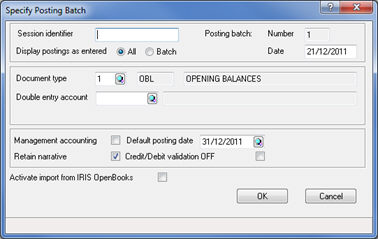
Select EPST (or EPSF for Farm clients).
Click OK.

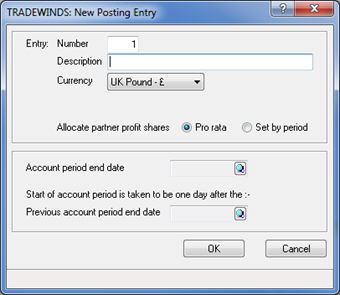
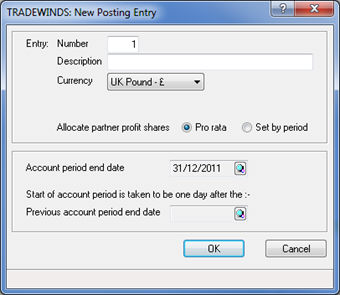
The following screen displays.
Enter a description for the posting file in the Description field.
Select the currency from the Currency field.
Click the magnifying glass from the Account
Period End Date field.
The following screen displays.
Enter the end date for the period and click OK.

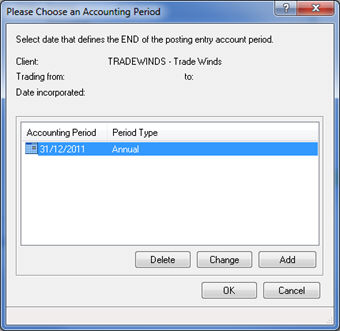
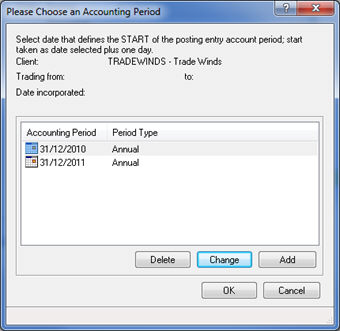
The following screen displays.
Highlight the relevant date and click OK.
The following screen displays.
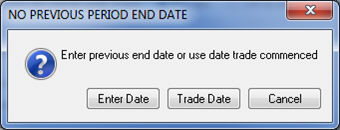
The following screen displays (if Enter Date has been selected).
Click Add.

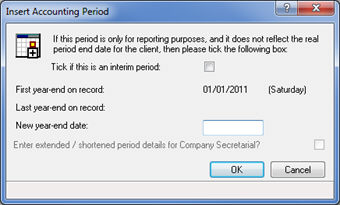
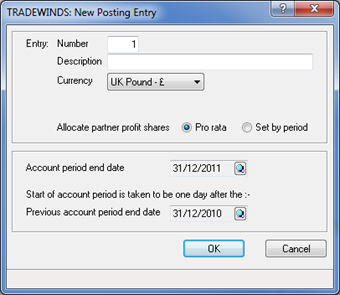
The following screen displays.
Enter the previous year end or a day before the start date if
it is the first year of trading and click OK.
The following screen displays.
Select the relevant date and click OK.
The following screen displays.
Review the details and click OK.
The following screen displays.