|
 |
|
|
This topic explains how to do a Share Transfer using the share register.
The following option is available within Accounts Production, Company Secretarial and Company Formations.
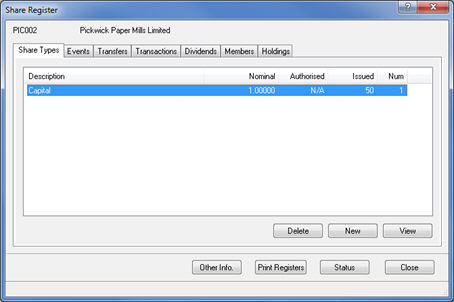
From the menu bar select Edit | Share Register.
In Accounts Production the Share Register option is only available where the Share Register Status is activated to indicate that the client's data is good for the period end this is for. To verify the Share Register Status go to Edit | Share Register Status.
The following screen displays:
Click the Transfers
tab and click New.
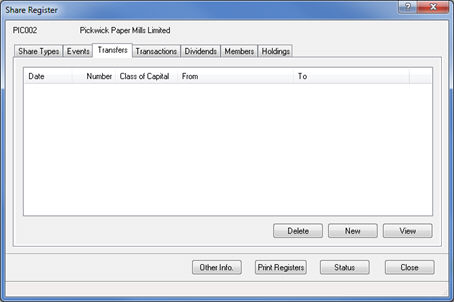
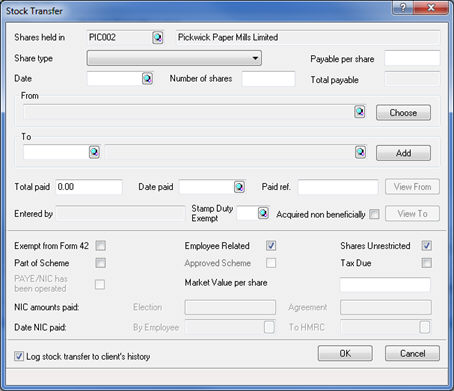
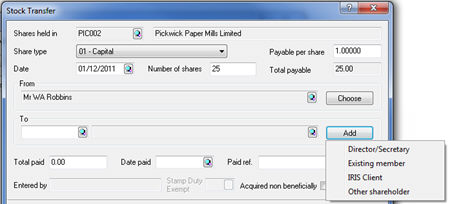
The following screen displays.
Select the share type to be transferred from the Share type list.
Enter the required payable per share value in the Payable per Share field.
Enter the relevant date in the Date field.
Enter the required number of shares to be transferred in the Number of Shares field.
The share type number will be multiplied with the Payable per share value and automatically entered in the Total Payable field.
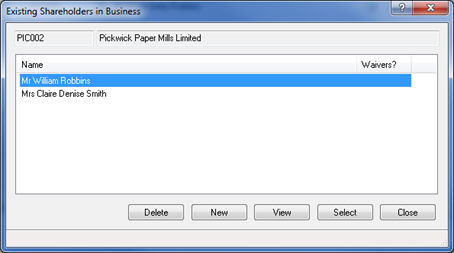
The From field allows you to choose the existing shareholder who is transferring their shares to a different/new shareholder.
The following screen displays.
This screen has options to Delete, Add or Edit existing shareholders.
Highlight the required shareholder and click Select.

When allocating the shares to the new shareholder, select Add in the To
field and choose the relevant option from the drop-down menu.
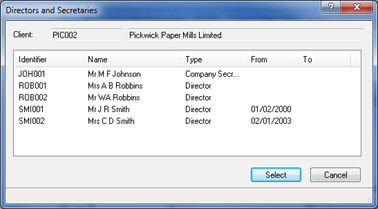
If the first option is selected the following screen displays.
This screen only displays when selecting Director/Secretary however a different screen will appear depending on the option you choose.
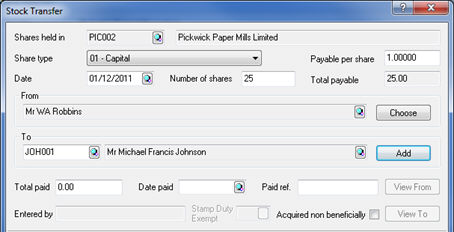
The Stock Transfer screen displays with the To
field completed with the name of the chosen Shareholder.
Enter the total paid in the Total Paid field.
Enter the relevant date in the Date Paid field.
Enter the reference in the Paid ref
field.
Entered By is completed automatically
with the staff member id that has inserted the transaction once OK has been clicked.
Acquired non beneficially -
to be used to indicate that the To
member specified above is not the beneficial owner of the shares.
Form 42 options are Employee Related,
Shares Unrestricted, Part of Scheme, Approved Scheme, PAYE/NIC has
been operated and Market Value per share. Select/enter the relevant
options as appropriate.
If the Log stock transfer to client's
history is ticked, IRIS will automatically generate a Stock Transfer form ready to be
printed from Reports | Company forms.
If not ticked, the transfer will show under the transfer tab
in the share register but no form will be automatically generated.
Once this screen has been completed click OK for the transfer to be saved and shown on the main transfer screen or Cancel to abort the creation of the new transfer.
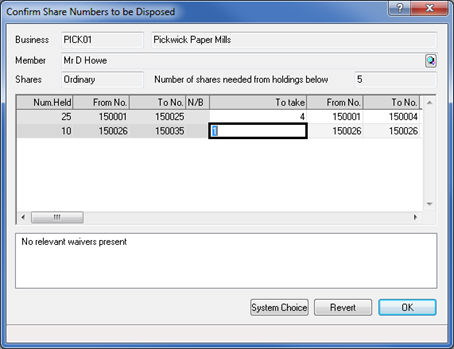
The following screen displays the shares to be transferred. Click System Choice to accept the IRIS default allocation or edit this screen to allocate specific shares.