|
 |
|
|
This topic explains how to create a set of accounts applying FRS 101 accounting standards to both the current and comparative year.
It does not show all of the potential adjusting journals or disclosures.
FRS 101 – is a Reduced Disclosure Framework – For subsidiary and ultimate parents of group companies who currently adopt full IFRS and is voluntary.
For further details regarding FRS 101 please visit the following website: https://www.frc.org.uk/
Click the links below to jump to a particular section:
Step 1 - Entering the date the accounting standards apply
Step 2 - Creating a FRS 101 Posting Entry
Step 3 – Data screens
Step 4 - Generating a set of Accounts
The following screen displays.
The following screen displays,
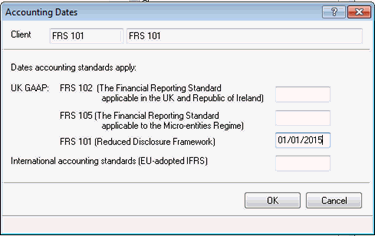
In the FRS 101 (Reduced Disclosure Framework) field enter the date the accounting standards apply, for example, 01/01/2015. The date entered will determine the first year of adoption. This must be identified for the appropriate disclosures to be included within the accounts.
Click OK.
The following screen displays:
The following screen displays.
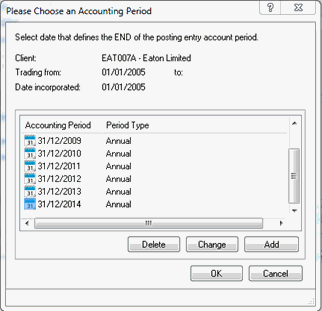
The following screen displays:
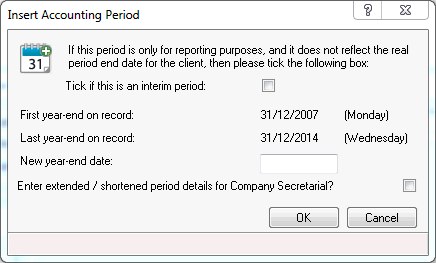
Complete the New year-end date field, for example, 31/12/2015. and click OK.
Highlight the date enter in step 3, for example, 31/12/2015 and click OK.
The following screen displays.
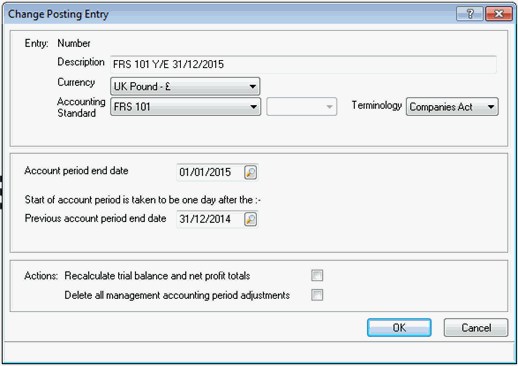
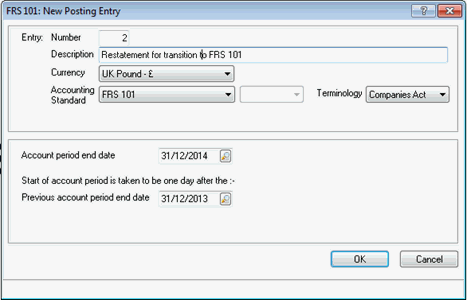
The Previous account period end date will be completed automatically with the previous date to the selected Account period end date. If this is the incorrect date click the magnifying glass next to the Previous account period end date. Highlight the relevant Previous account period end date and click OK.
Complete the Description field.
From the Accounting Standard field confirm FRS 101 is selected.
From the drop-down menu next to Terminology click on one of the following options:
Companies Act – if this option is selected, the financial statements will use Companies Act terminology, that is, Turnover, Stocks.
FRS - if this option is selected, the financial statements will use IFRS terminology, that is, Revenue, Inventories.
The Companies Act option will be selected by default.
The following screen displays.
The following screen displays.
Click OK.
The following screen displays.
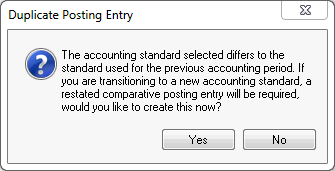
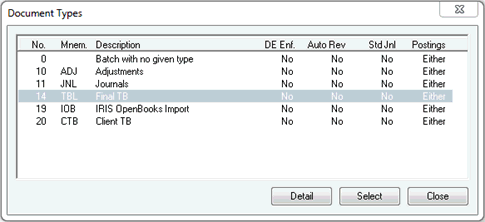
In order to create the comparative post file you will be required to select a document type for the imported trial balance.
You may wish to create a new document type to clearly categories these imported entries.
Highlight the desired Document type and click Select.
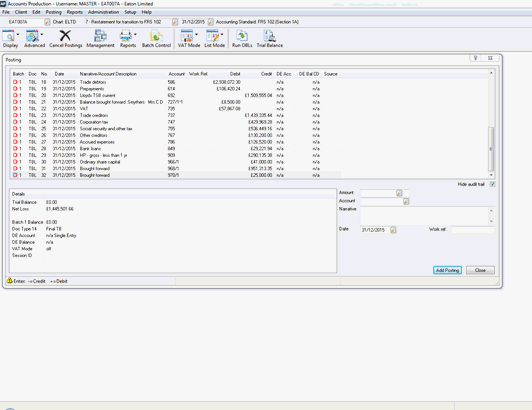
The comparative year posting screen will display.
Make any necessary adjustments and select Close when complete.
Once adjustments have been made select Posting | Select to open the current years posting entry, for example, 31/12/2015.
The following screen displays.
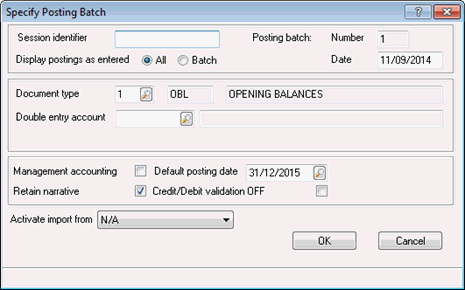
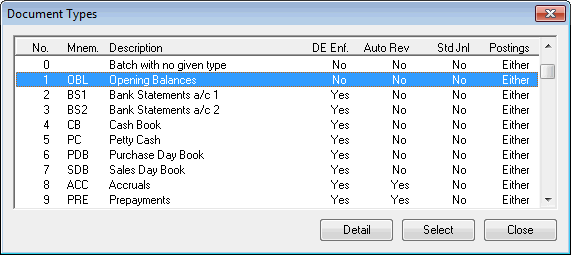
Enter a session identifier then click the magnifying glass next to the Document type field.
The following screen displays.
Highlight the relevant Document type, click Select.
Click OK.
The following screen displays.
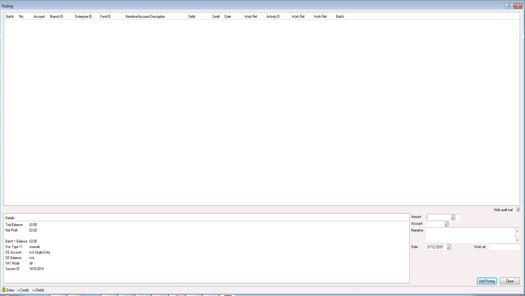
Postings will be displayed where document type 1 has been selected to bring forward opening balances.
Here you make all your postings. In the Amount field enter the amount.
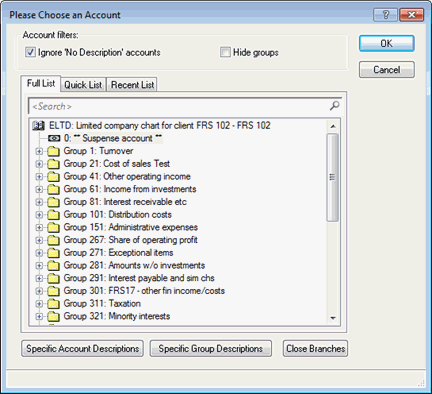
Click the magnifying glass next to the Account field. Alternatively, manually enter the account code and then go to step 21.
The following screen displays.
Click on the relevant account code from the list.
Click Add Posting.
The Posting screen displays.
If further postings are required repeat steps 18-21. If no further postings are required, click Close to exit the posting screen.
When opening the data screens for the comparative
period the data screen will display as follows:
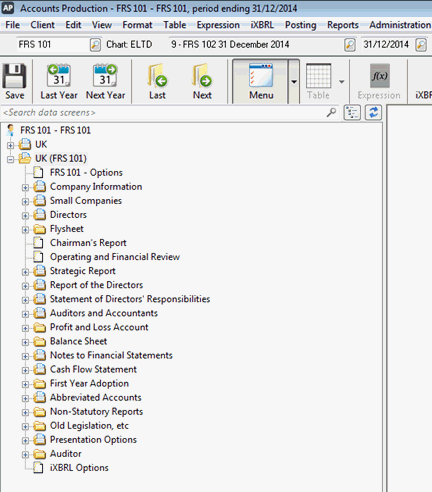
The data screen options contain both UK and UK (FRS 101) folders. This is because of the duplicate posting period and the two different standards that are applied to it. The First Year Adjustment section will always be present within the data screens to allow clients to move between IFRS, FRS101 and FRS102 at any time.
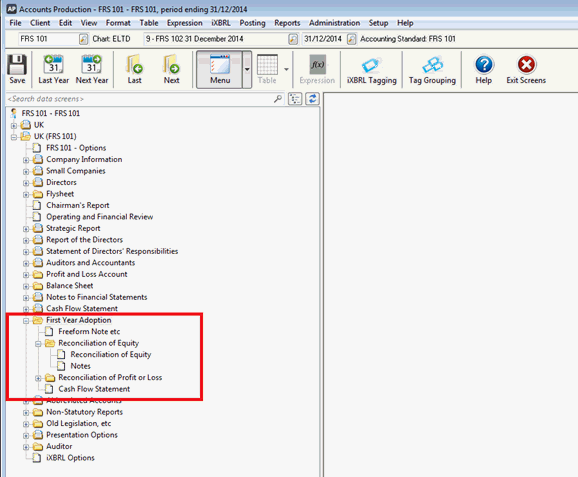
When opening the data screens for the first
year of FRS 101, the data screen
will display as follows:
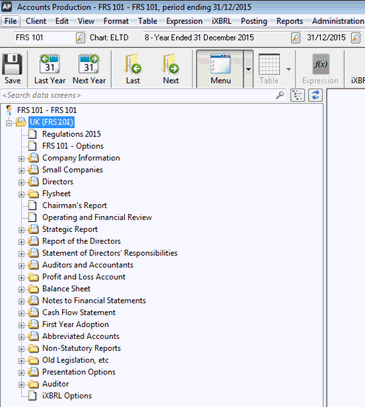
The data screen option only displays the UK (FRS 101) folder.
Within the FRS 101 – Options data screen you can make further presentational choices including whether to display the income and expenses with a single or two statement approach and some further terminology preference settings.
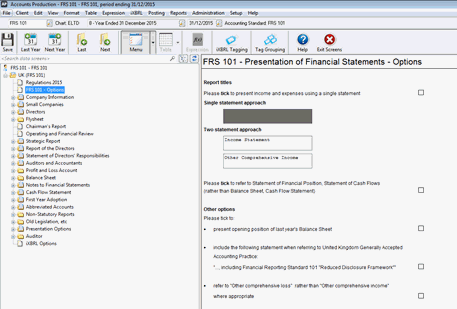
Both of these reports may require corresponding notes which should be entered in the appropriate First Year Adoption data screen provided.
For further information on each data screen
select the  option.
From the Accounts Production Quick Launch toolbar, click Annual Report. Alternatively from the main toolbar click Reports | Annual
Click one of the following options:
Standard – to generate a set of accounts to the Printer, PDF, Word Processor, Screen or upload to IRIS OpenSpace.
Interactive – to generate an interactive report.
For further information click here for information on Interactive Reporting.
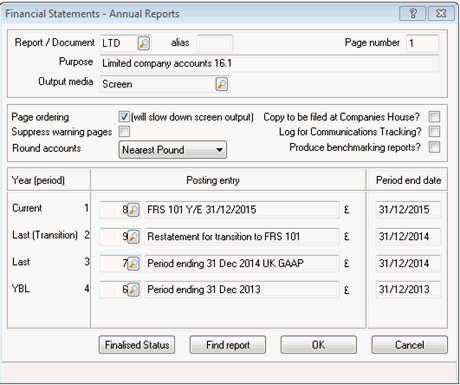
When generating a set of accounts, where the first year of adoption of FRS 101 is identified, the following screen displays.
Ensure the relevant Report/Document type is entered.
Ensure the correct Posting entry fields are selected.
Click OK.